


As well as being a programmer, I am a mad keen guitarist, and over the years, I have built up a sizeable collection of guitars of all types and models. One thing about guitars though (acoustic guitars in particular), is that they are quite sensitive to environmental conditions such as temperature and humidity.
Similar to people, guitars like to kept and a relatively cool temperature and somewhere not too dry or damp. Seeing as I live in the tropics, this can be a challenge at time, which is why I try and keep my guitars in my home office, which is secure, as well as air conditioned most of the time.
However, air conditioning is not perfect, and sometimes things like a power failure or someone leaving a window ajar can affect the overall climate of the room. Because I often travel for work and am away from the home office for days at a time, I'd like to keep an eye on any anomalies, so I can advise another family member at home to check or rectify the situation.
What better way than to try and use my programming skills to (a) learn some new skills, and (b) do some experimenting with this whole IoT (internet of things) buzz. Please note that my normal programming work involves business and enterprise type databases and reporting tools, so programming hardware devices is a new thing for me.
The end result is that I wanted a web page that I could access from ANYWHERE in the world, which would give me real time stats as to the temperature and humidity variations in the guitar room throughout a 24 hour period.
Please bear in mind, I am going to try and document ALL the steps I took to build this system, so this blog post is VERY long, but hopefully will serve as a guide for someone else who wants to build something similar.
The steps I will be going through here are:
1. Setting up the Omega Onion to work with my PC
2. Hooking up the DHT22 temperature and humidity sensor to my Onion
3. Installing all the requisite software on the Onion to be able to do what I want
4. Set up Amazon IoT so that the Onion can be a 'thing' on the Amazon IoT cloud
5. Setting up a DynamoDB database on Amazon AWS to store the temperature/humidity readings from the Onion
6. Setting up a web page to read the data from DynamoDB to present it as a chart.
Here is what the final chart will look like:

Hat tip: I used this blog post as inspiration for designing the dashboard and pulling data from DynamoDB.
The Hardware
Well, over a year ago I participated in the Onion Omega kickstarter project. I'd got one of these tiny little thumb sized Linux computers but didn't quite know what to do with it so it sat in its box for a long while until I decided to dust it off this week.
Connecting the Onion up to it's programming board, I hooked it up to a USB cable from my iMac. In order to get communications happening, I had to download and install a USB to UART driver from here:
https://www.silabs.com/Support%20Documents/Software/Mac_OSX_VCP_Driver.zip
Full instructions on connecting the Omega Onion to your Mac is on their Wiki page:
https://wiki.onion.io/get-started
Once I had connected the two devices, I was able to issue the command
screen /dev/tty.SLAB_USBtoUART 115200
from a Terminal screen to connect to the device. Yay!
First thing I had to do was to set up the WiFi so that I could access the device using my local home office WIFi network. That was a simple case of issuing the command
wifisetup
It is a simple step by step program that asks you for your WiFi access point name and security key. Once again, the Wiki link above explains it in more detail.
Once the Wifi is setup on the Onion, you can then access it via its IP address using a web browser. My device ended up being 192.168.15.11, so it was a matter of entering that address in Chrome. Once logged in (the default username is 'root' and password 'onioneer'), you get to see this:

First things first, because my device was so old, I had to go to 'Settings' and run a Firmware Update.

I also dug out an old HDT22 sensor unit which I played around with when I dabbled in Arduino projects a while back. I wondered if I could pair the HDT22 with the Onion device, and lo behold, a quick search on the Onion forums showed that this had been done before, quite easily. Here is a blog post detailing how to hook up the HDT22 to the Onion:
https://wiki.onion.io/Tutorials/PHP-DHT11-DHT22-Sensor-Examples
The article shows you how to wire the two devices together using only 3 wires. In short, the wiring is as follows on my unit:
Pin 1 from the HDT22 goes to the 5.5V plug on the Omega Onion
Pin 2 from the HDT22 goes to GPIO port 6 on my Onion
Pin 3 is unused on the HDT22
Pin 4 from the HDT22 goes to the GND (Ground) plug on the Onion
The Software
Now we come to all the software that we will need to be able to collect the data, and send it along to Amazon. In short, we will be writing all our code in Node.js. But we will also be calling some command line utilities to (a) read the data from the HDT22 and (b) send it to the Amazon IoT cloud.
To collect the data, we will be using an app called 'checkHumidity' which is detailed on the page above about setting up the DHT22. To talk to the Amazon IoT cloud, we need to use the MQTT protocol. To do this, will be using an app called 'mosquitto' which is a nice, neat MQTT wrapper. We can use HTTPS, but MQTT just seemed more efficient and I wanted to experiment with it.
So lets go through these steps for installation. All the packages are fairly small, so it won't take up much room on the 16MB storage on the Onion. I think my Onion still has about 2MB left after all installs. Here goes (from the Onion command line):
(1) Install the checkHumidity app and set the permissions for running it. checkHumidity is so much cleaner than trying to read the pins on the Onion in Node.js. Running it returns the temperature (in degrees Celsius) and the humidity (as a percentage) in a text response.
opkg update
opkg install wget
cd /root
wget https://community.onion.io/uploads/files/1450434316215-checkhumidity.tar.gz
tar -zxvf 1450434316215-checkhumidity.tar.gz
chmod -R 755 /root/checkHumidity/bin/checkHumidity
If your HDT 22 is connected to pin 6 like my board, try it out:
/root/checkHumidity/bin/checkHumidity 6 HDT22
29.6
49.301
Showing me 29.6 degrees C wilth 49.301% humidity!
(2) Install Node.js on the Onion. From here on in, we will be using the opkg manager to install:
opkg install nodejs
(3) I also installed nano because it is my favourite editor on Linux. You can bypass this if you are happy with any other editor (Note: There is also an editor on the web interface, but I had some issues with saving on it):
opkg install nano
(4) Install the mosquitto app for MQTT conversations:
opkg install mosquitto
opkg install mosquitto-client
This installs the mosquitto broker and client. We won't really be using the broker, mainly the client, but it is handy to have if you want to set up your Onion as an MQTT bridge later.
Amazon IoT
Ok, now we have almost everything prepped on the device itself, we need to set up a 'thing' on Amazon's IoT cloud to mimic the Onion. The 'thing' you set up on Amazon acts as a cloud repository for information you want to store on your IoT device. Amazon uses a concept of a 'shadow' for the 'thing' that can store the data. That way, even if your physical 'thing' is powered off or offline, You can still send MQTT packets of data to the 'thing', and the data will be stored on the 'shadow' copy of the 'thing' in the cloud until the device comes back online, at which point Amazon can copy the 'shadow' data back to the physical device.
You see, our Node.js app will be pushing temperature and humidity data to the shadow copy of the 'thing' in the cloud. From there, we can set up a rule on Amazon IoT to further push that data into a DynamoDB database.
Setting up the 'thing' on the cloud can be a little tricky. Mainly due to the security. Because the physical device will be working unattended and pretty much anonymously, authentication is carried out using security certificates. Lets step through the creation of a 'thing'. (Note: This tutorial assumes you already have an AWS account set up).
From the Amazon Console, click on 'Services' on the top toolbar, then choose 'AWS IoT' under 'Internet Of Things'.
On the left hand menu, click on 'Registry', then 'Things'.

Your screen will probably be blank if you have never created a thing before. Click on 'Create' way over on the top right hand side of your screen.
You will need to give you thing a name. Call it anything you like. I just used the unique name for my Omega Onion, which looks like Omega-XXXX.

Great! Next, you will be taken to a screen showing all the information for your 'thing'. Click on the 'Security' option on the left hand side.
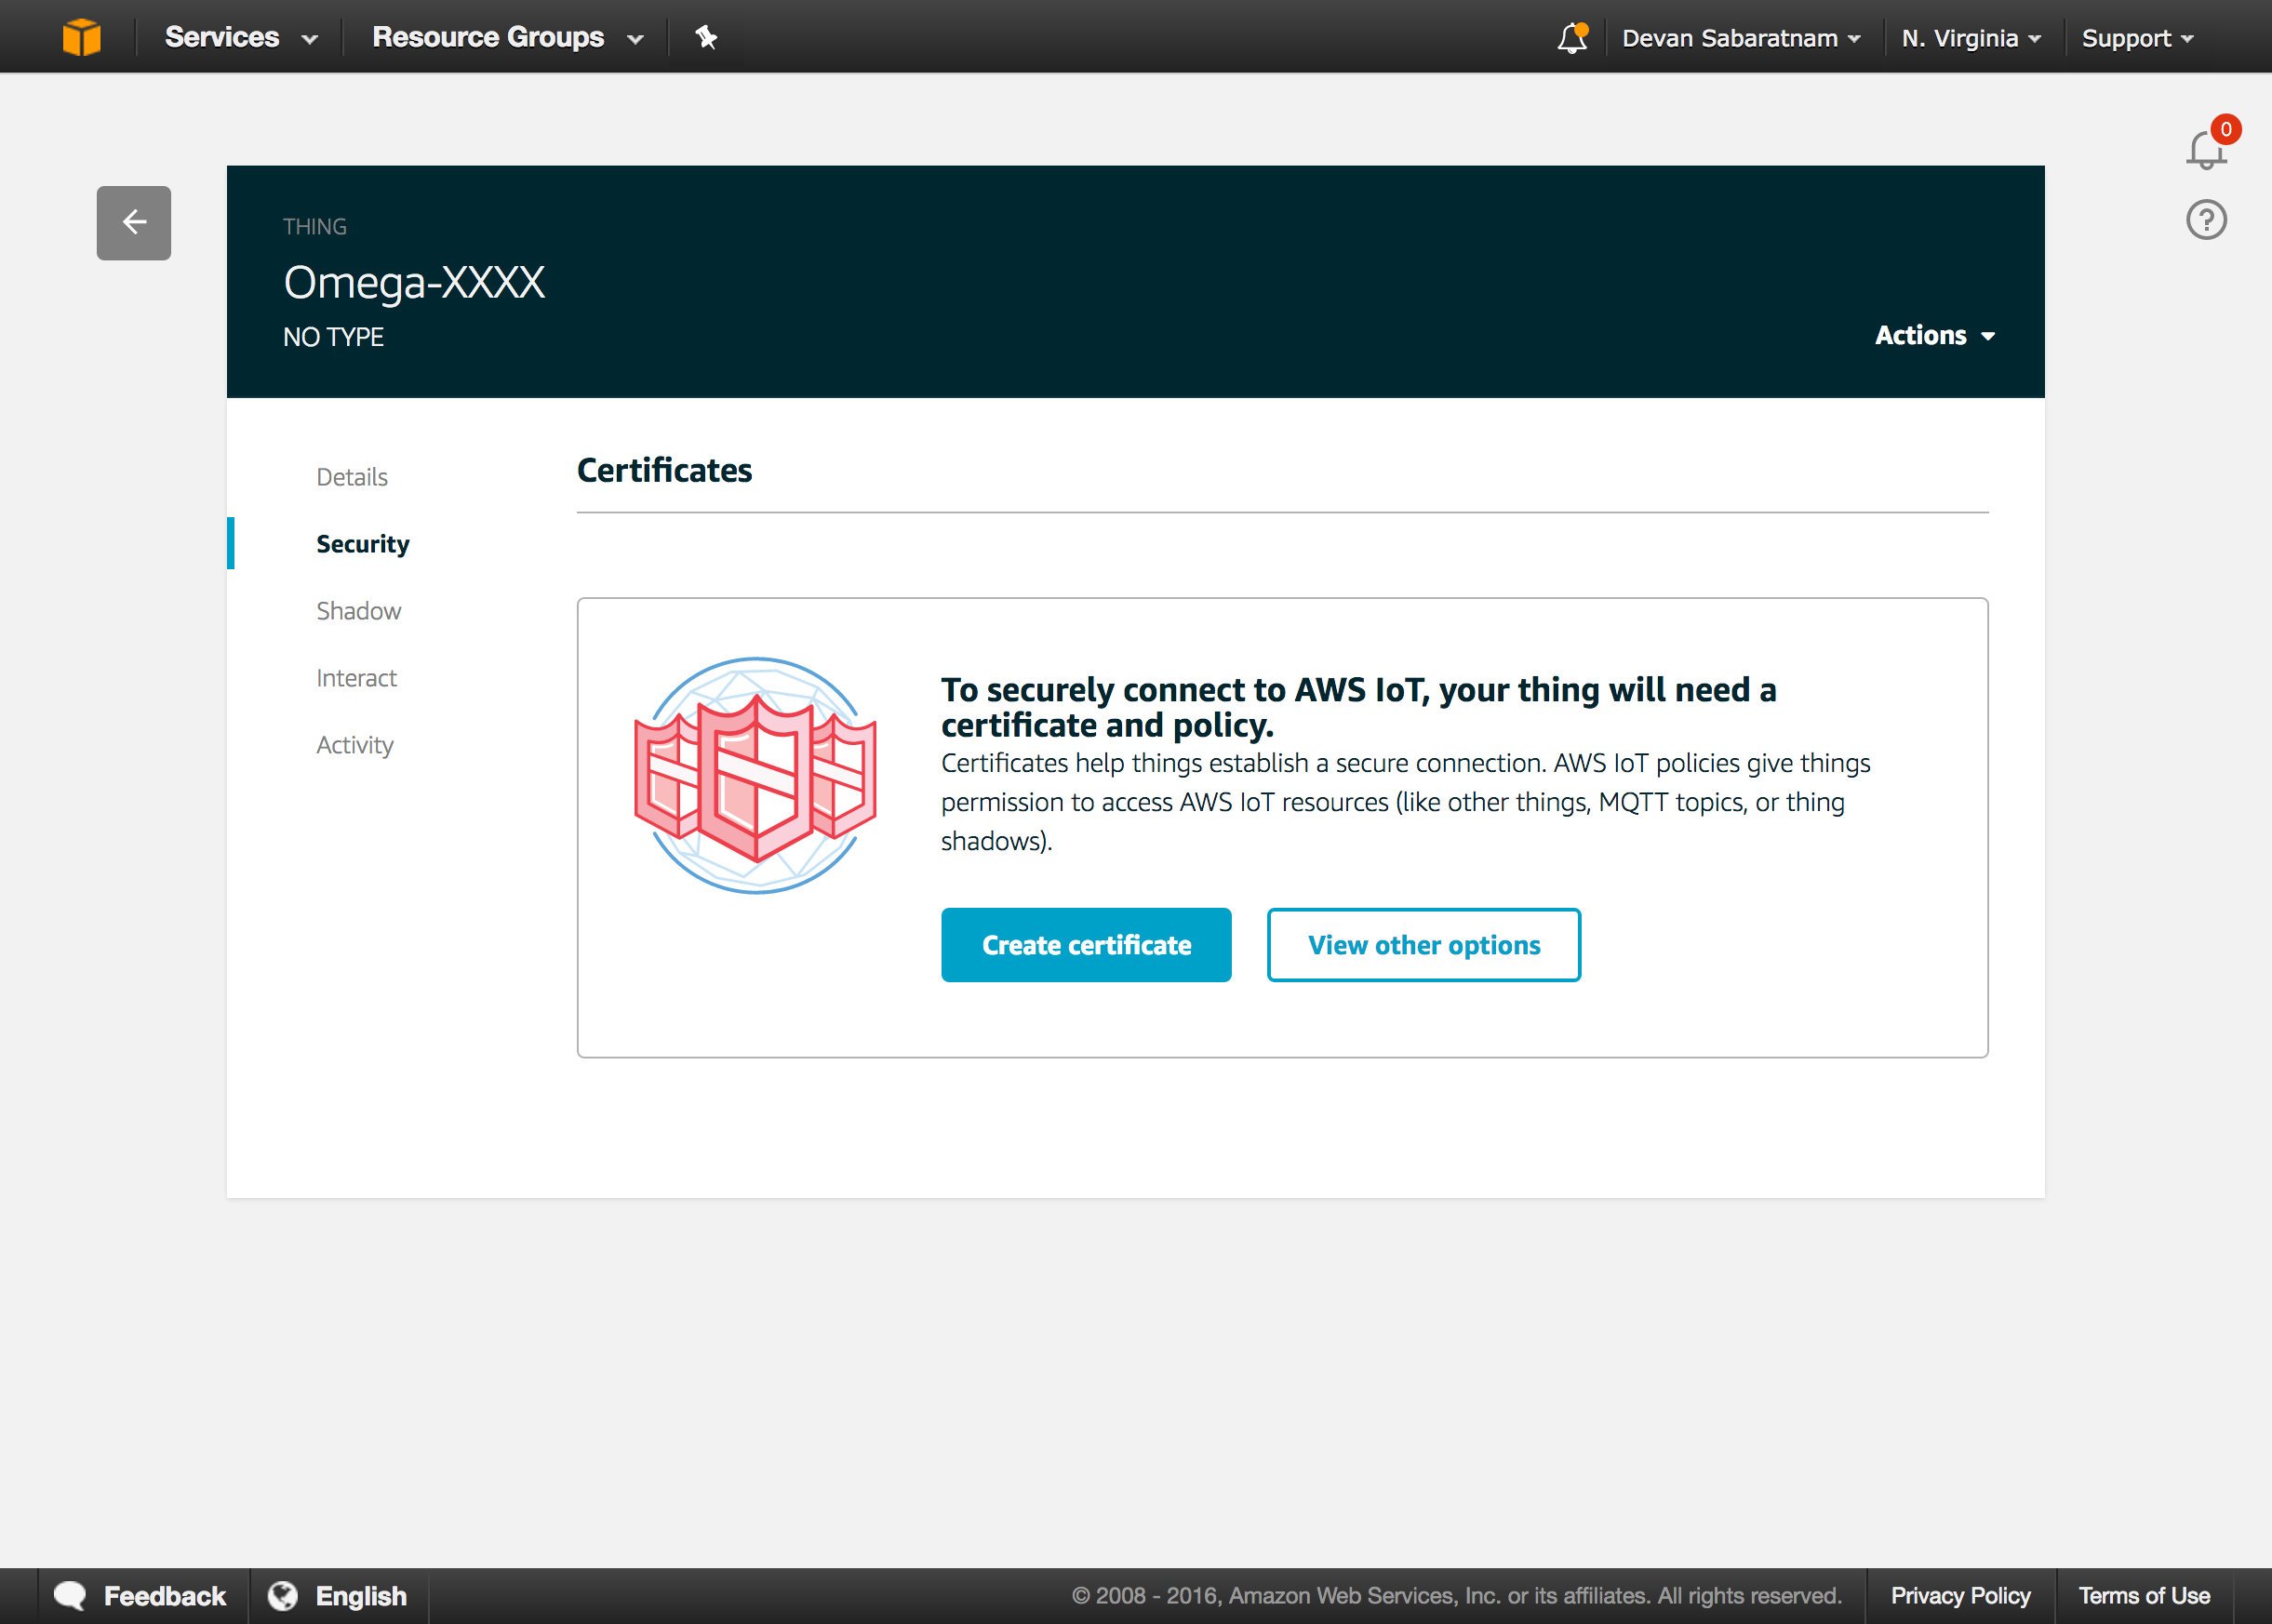
Click on the 'Create Certificate' button.

You can now download all four certificates from this screen and store them in a safe place.
NOTE: DON'T FORGET to click on the link for 'A root CA for AWS IoT Download'. This is the Root CA certificate that we will need later. Store all 4 certificates in a safe place for now on your local hard drive. Don't lose them or you will have to recreate the certificates again and re-attach policies etc. Messy stuff.
Lastly, click on 'Activate' to activate your certificates and your thing.
Next, we have to attach a policy to this certificate. There is a button marked 'Create Policy' on this security screen. Click it, and you will see the next screen asking you to create a new policy.
We are going to create a simple policy that lets us perform any IoT action against any device. This is rather all encompassing, and in a production environment, you may want to restrict the policy down a little, but for the sake of this exercise, we will enable all actions to all devices under this policy:

In the 'Action' field, enter 'iot:*' for all IoT actions, and in the 'Reource ARN' field, enter '*' for all devices and topics etc. Don't forget to tick the 'Allow' button below, then click 'Create'.
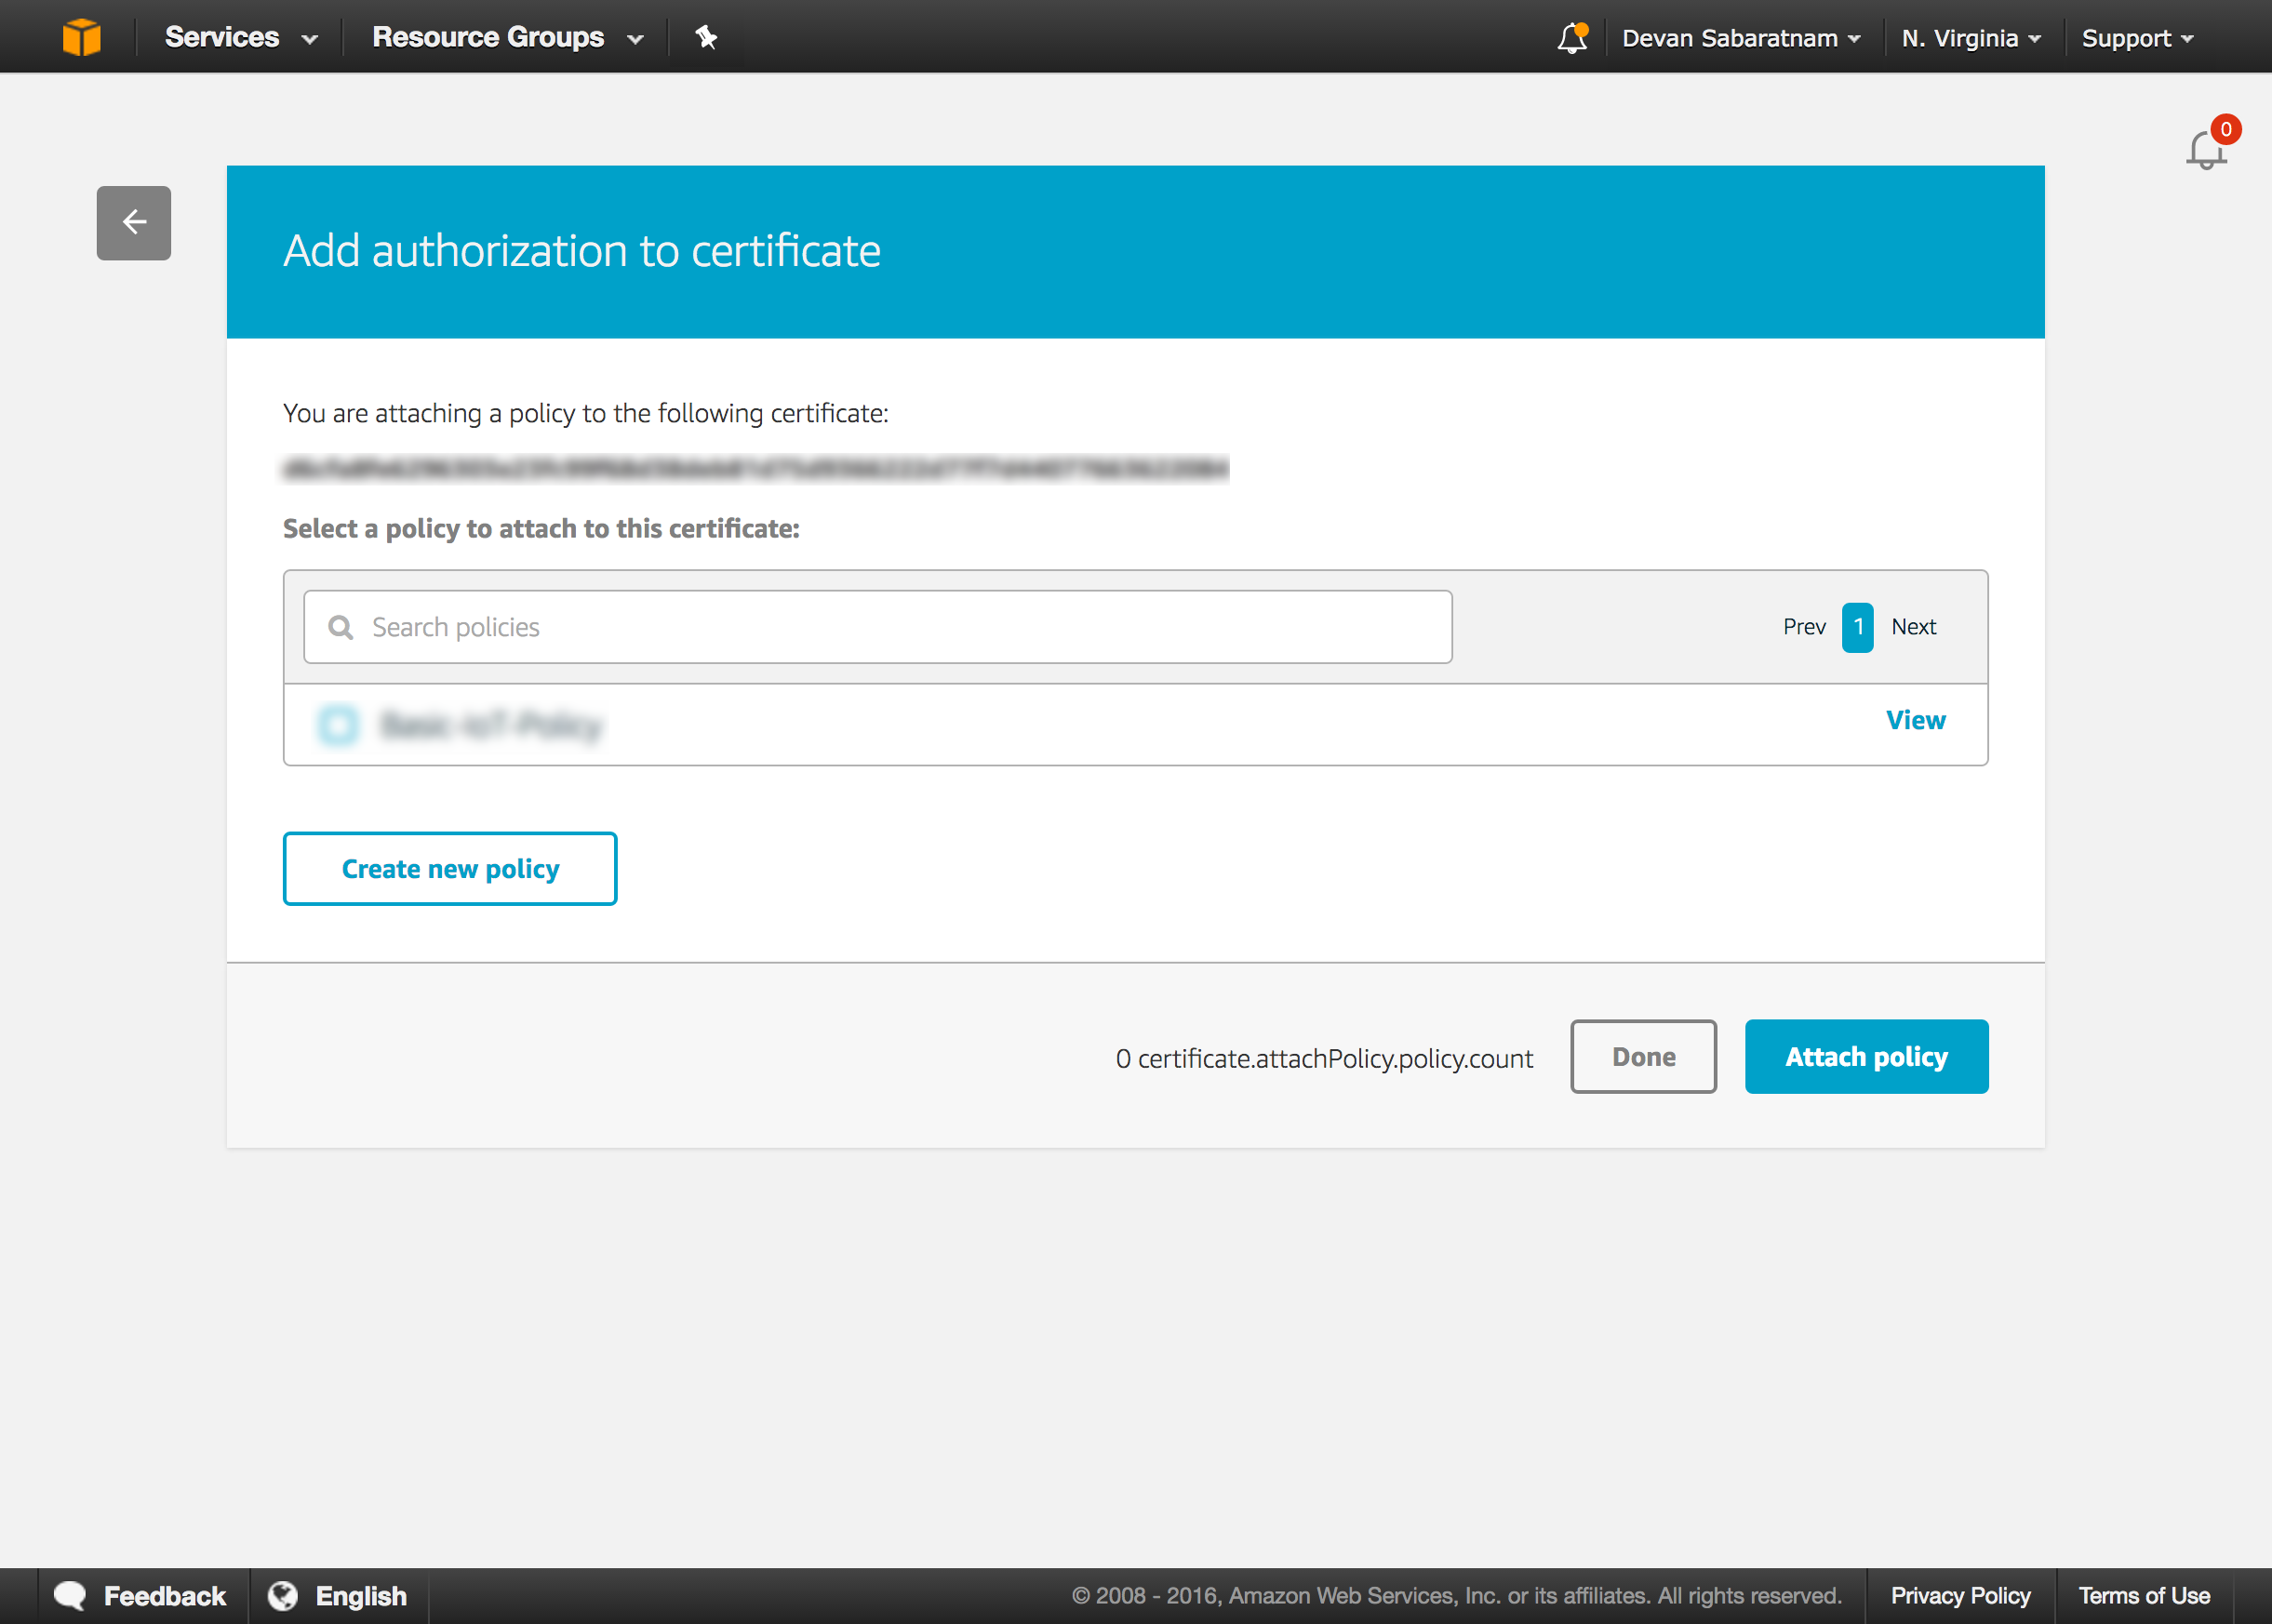
You now have a thing, a set of security certificates for the thing, and a policy to control the certificates against the thing. Hopefully the policy should be attached to the certificates that you just created. If not, you will have to manually attach the policy to the certificates. To do this, click on 'Security' on the left hand menu, then click on 'Certificates', then click on the certificate that you just created.

Click on the 'Policies' on the left hand side of the certificate screen.

If you see 'There are no policies attached to this certificate', then you need to attach it by clicking on the 'Actions' drop down on the top right, then choosing 'Attach Policy' from the drop down menu.

Simply tick the policy you want to attach to this certificate, then click 'Attach'.
You may want to now click on 'Things' on the left hand menu to ensure that the thing you created is attached to the certificate as well.
To ensure all your ducks are in a row:-
The 'thing' -> needs to have -> Security Certificate(s) -> needs to be attached to -> A Policy
Actually, there is one more factor that we want to note on here which is important for later. Go ahead and click on the 'Registry' then 'Things' on the IoT dashboard. Choose the thing you just created, and then click on the 'Interact' option on the left hand menu that pops up.
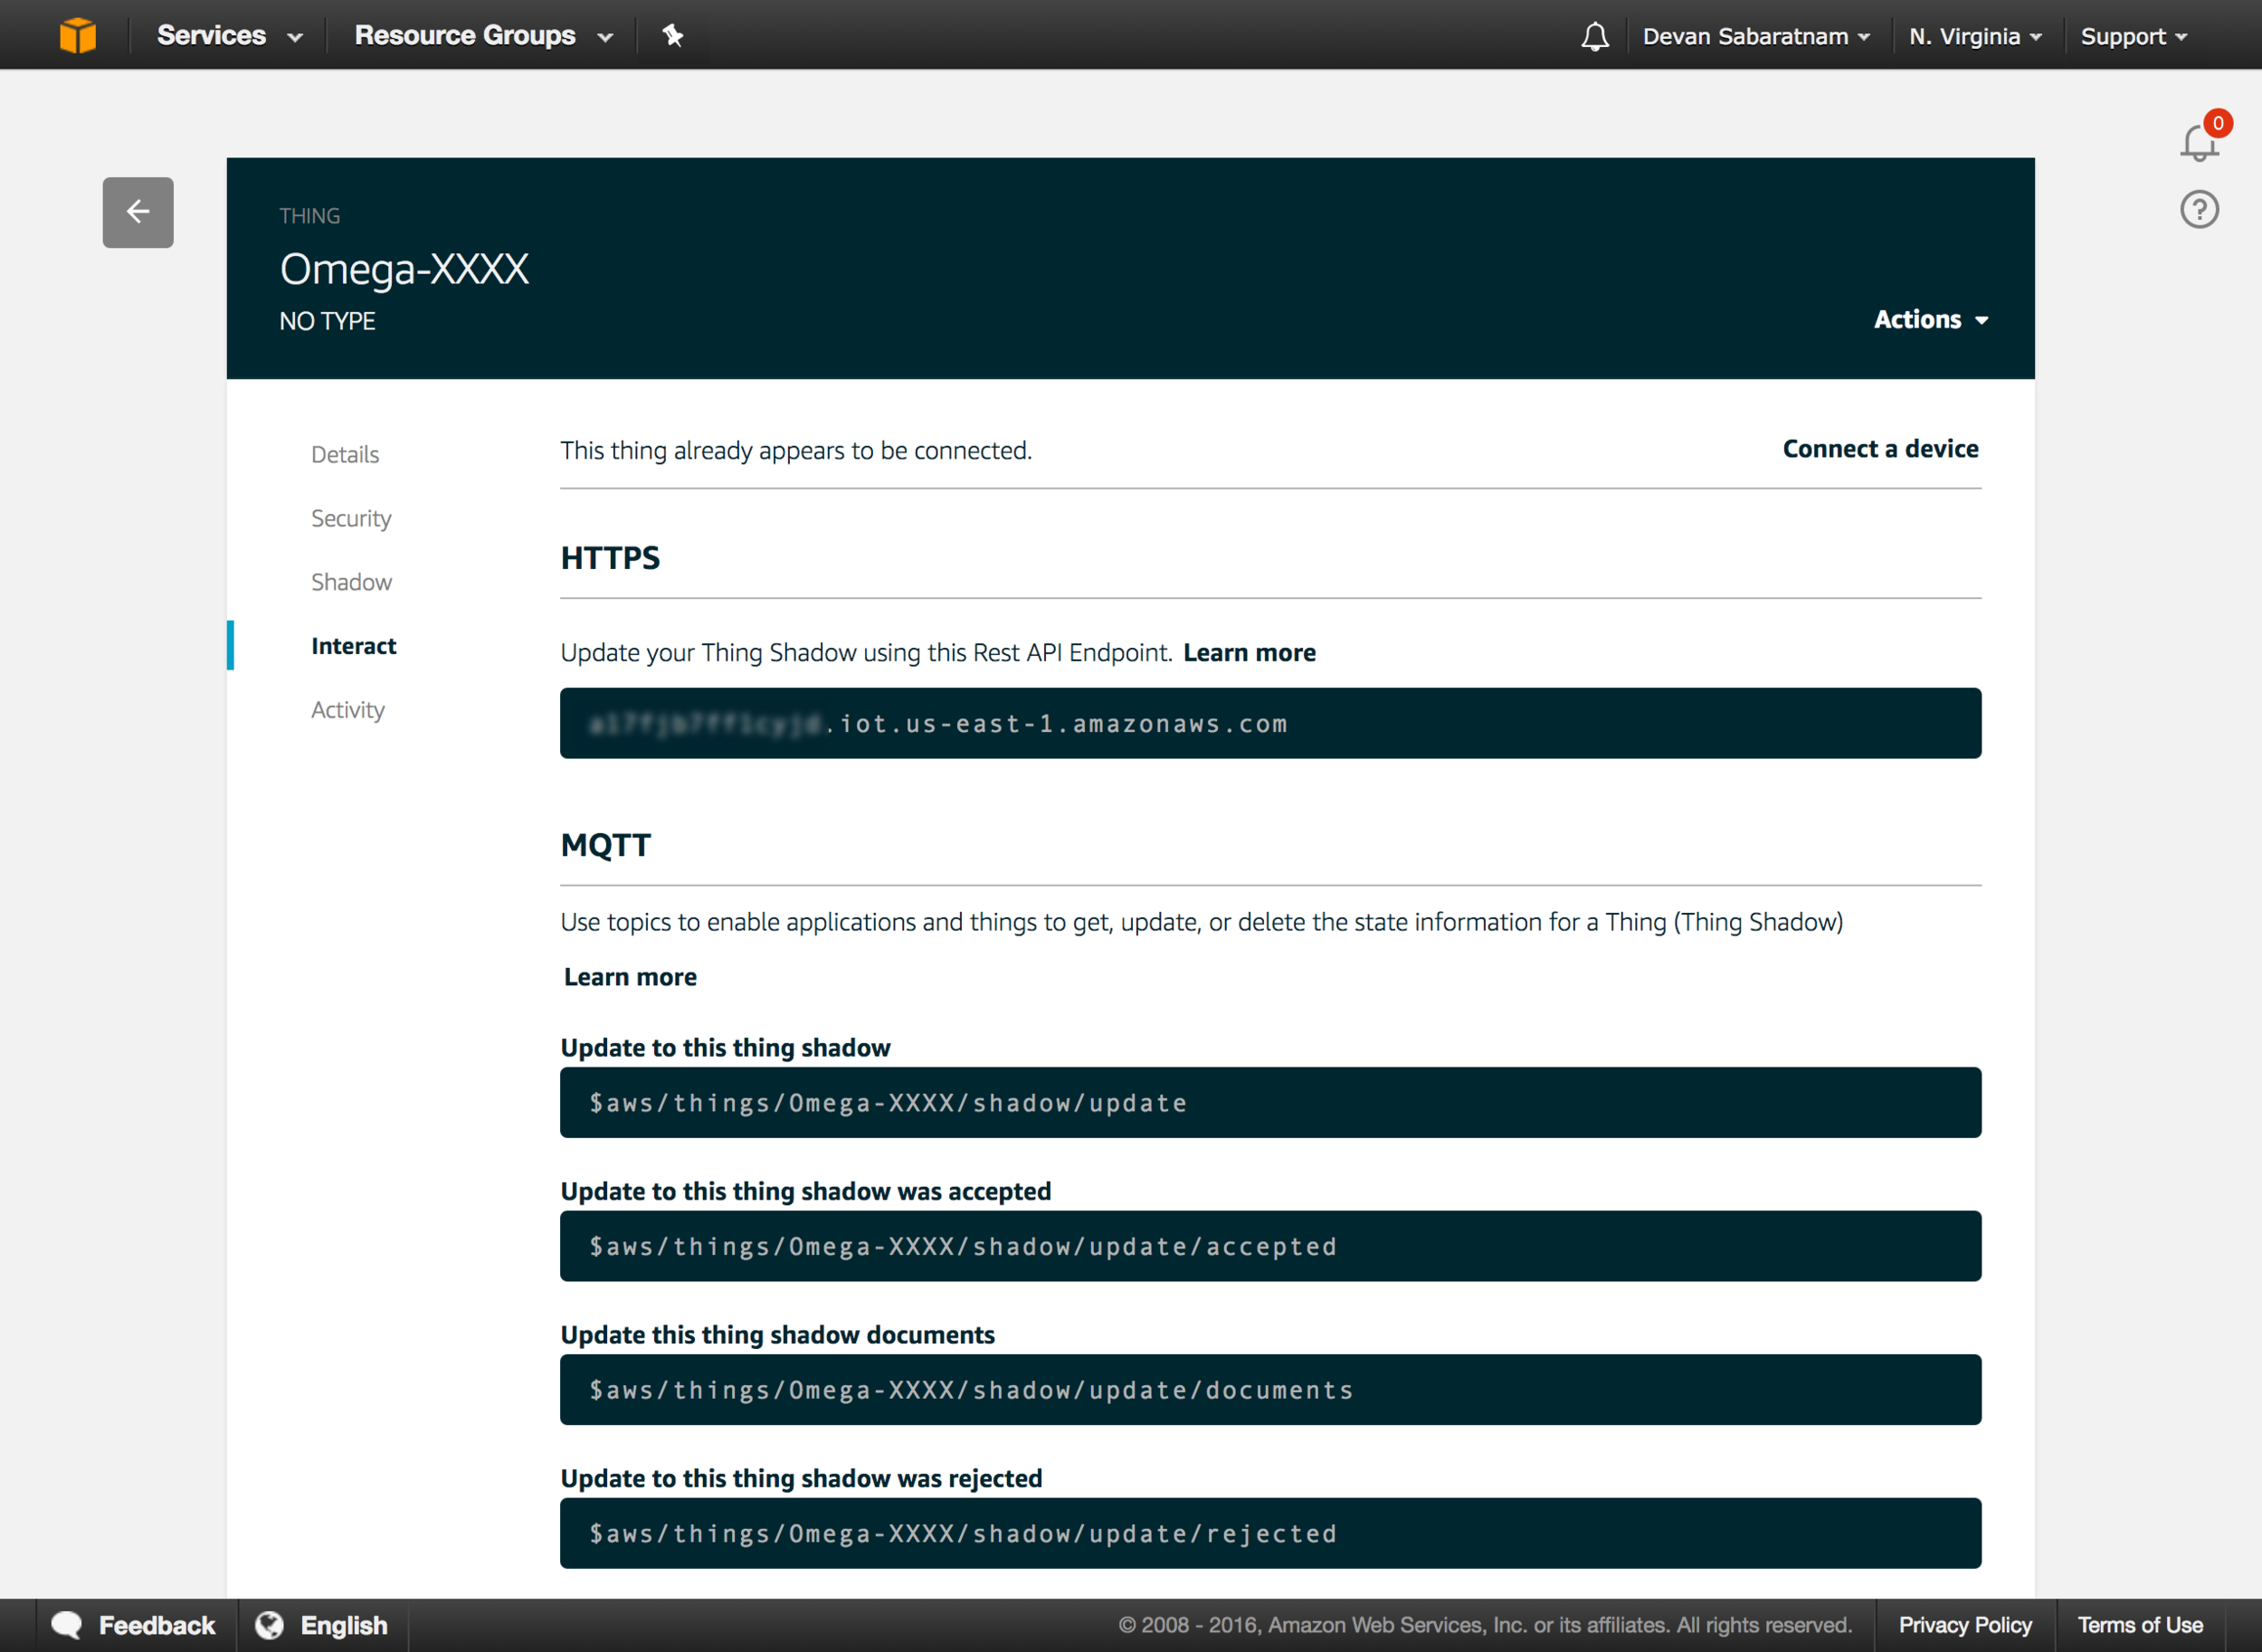
Notice under HTTPS, there is a REST API endpoint shown. Copy this information down and keep it aside for now, because we will need it in our Node.js code later to specify which host we want to talk to. This host address is unique for each Amazon IoT account, so keep it safe and under wraps.
Also note on this screen that there are some special Amazon IoT reserved topics that can be used to update or read the shadow copy of your IoT thing. We won't really be using these in this project, but it is handy to know for more complex projects where you might have several devices talking to each other, and also devices that may go on and offline a lot. The 'shadow' feature allows you to still 'talk' to those devices even though they are offline or unavailable, and lets them sync up later. Very powerful stuff.
Next, we will take a break from the IoT section, and set up a DynamoDB table to collect the data from the Onion.
Amazon DynamoDB
Click on 'Services' then 'Dynamo DB' under 'Databases'.

Click on 'Create Table'.

Give the table a meaningful name. Important: Give the partition key the name of 'id' and set it to a 'String' type. Tick the box that says 'Add sort key' and give the key a name of 'timestamp' and set it to a 'Number' type. This is very important, and you cannot change it later, so please ensure your setup looks like above.

Tip: Once you have created your DynamoDB table, copy down the "Amazon Resource Name (ARN)" on the bottom of the table information screen (circled in red above). You will need this bit of information later when creating a security policy for reading data from this table to show on the web site chart.
Ok, now that you have a table being created, you can go back to the Amazon IoT Dashboard again for the next step ('Services' then 'AWS IoT' in your console top menu). What we will do now is create a 'Rule' in IoT which will handball any data coming in to a certain topic across to DynamoDB to store in a data file.
Tip: When you transmit data to an IoT thing using MQTT, you generally post the data to a 'topic'. The topic can be anything you like. Amazon IoT has some reserved topic names that do certain things, but you can post MQTT packets to any topic name you make up on the spot. Your devices can also listen on a particular topic for data coming back from Amazon etc. MQTT is really quite a nice, powerful and simple way to interact with IoT devices and servers.
In the IoT dashboard, click on 'Rules' on the left hand side, then click the 'Create' button.

The 'Name' can be something distinctive that you make up. Add a 'Description' to help you remember what this rule does. For the 'SQL Version', just choose '2016-03-23' which is the latest one at time of writing.
Below that, on 'Attribute', type in '*' because we will be selecting ALL fields sent to us. In the 'Topic Filter', type in 'temp-humidity/+'. This is the topic name that we will be listening out for. You can call it anything you like. We include a '/+' at the end of the topic name because we can add extra data after this, and we want the query to treat this extra data as a 'wildcard' and still select it. (Note: We will be adding the device name to the end of the topic as an identifier (e.g. temp-humidity/Omega-XXXX). This way, if we later have multiple temperature/humidity sensors, we can identify each one via a different topic suffix, but still get all the data from all sensors sent to DynamoDB).
ERRATA: The screenshot above shows 'temp-humidity' in the 'Topic Filter' field, but it should actually be 'temp-humidity/+'.
Leave the 'Condition' blank.
Now below this, you will see an 'Add Action' button. Click this, and choose 'Insert a message into a DynamoDB table'.

As you can see, there is a myriad of other things you can do, including on forwarding the data to another IoT device. But for now, we will just focus on writing the data and finishing there. Click on the 'Configure Action' button at the bottom of the screen.

Choose the DynamoDB table we just created from the drop down 'Table Name'. The 'Hash Key' should be 'id', of type 'STRING', and in the 'Hash Key Value', enter '${topic()}'. It means we will be storing the topic name as the main key.
The 'Range Key' should be 'timestamp' with a type of 'NUMBER'. The 'Range Key Value' should be '${timestamp()}'. This will place the contents of the packet timestamp in this field.
Lastly, in the the 'Write Message Data To This Column', I enter in 'payload'. This is the name of the data column that contains the object with the JSON data packet sent from the device. You can call this column anything you like, but I like to call it 'payload' or 'iotdata' or similar so that I know all the packet information is stored under here.
One more thing to do, for security purposes, we have to set up an IAM role which will allow us to add data to the DynamoDB table. This is actually quite easy to do from here. Click the 'Create A New Role' button.

Give the role a meaningful name, then click 'Create A New Role'. A new button will show up with the text next to it saying 'Give AWS IoT permission to send a message to the selected resource'. Click on the 'Update Role' button.
Important: You must click the 'Update Role' button to set the privileges properly. Once completed, click the 'Update' button.

Thats It! We are pretty much done as far as Amazon IoT and DynamoDB setup. It was quite a rigmarole wasn't it? Lots of steps that have to be done in a certain order. But the good news is that once this is done, the rest of the project is quite easy, AND FUN!
Installing Certificates
Oh, Wait - One more slightly tedious step to do. Remember those 4 certificates we downloaded much earlier? Now is the time we need to put them to good use (well, 3 out of the 4 at least). We need to copy these certificates to the Onion. I found it easiest to copy and paste the text contents of the certificate over onto the '/home/certs' folder on the Onion. I simply used the web interface editor to create the files in the '/home/certs' folder and paste the contents of the certificate I downloaded. The three certificates I needed (and which I copied and renamed) are:
- VeriSign-Class3-Public-Primary-Certification-Authority-G5.pem -> /home/certs/rootCA.pem
- x1234abcd56ef-certificate.pem.crt -> /home/certs/certificate.pem
- x1234abcd56ef-private.pem.key -> /home/certs/private.key
As you can see, I shortened down the file name for ease of handling, and put them all into one folder for easy access from my Node.js app too. That's it. Once done, you don't have to muck about with certificates any more.
Exactly where you store the certificates or what you call them is not important, you just need to know the details later when writing the Node.js script.
Writing Code
Ok, back to the Omega Onion now, where we will write the code to grab information from the HDT22 and transmit it to Amazon IoT. This is where the rubber hits the road. Using nano, or the web editor on the Onion, create a file called '/home/app.js' and enter the following:
var util = require('util');
var spawn = require('child_process').spawn;
var execFile = require('child_process').execFile;

var mosqparam = [
'--cafile', '/home/certs/rootCA.pem',
'--cert', '/home/certs/certificate.pem',
'--key', '/home/certs/private.key',
'-h', 'a1b2c3d4e5f6g7.iot.us-east-1.amazonaws.com',
'-p', '8883'
];

setInterval(function() {
execFile('/root/checkHumidity/bin/checkHumidity', ['6','DHT22'], function(error, stdout, stderr) {
var dataArray = stdout.split("\n");
var logDate = new Date()
var postData = {
datetime: logDate.toISOString(),
temperature: parseFloat(dataArray[1]),
humidity: parseFloat(dataArray[0])
}
// publish to main data queue (for DynamoDB)
execFile('mosquitto_pub', mosqparam.concat('-t', 'temp-humidity/Omega-XXXX', '-m', JSON.stringify(postData)), function(error, stdout, stderr) {
// published
});
// publish to device shadow
var shadowPayload = {
state: {
desired: {
datetime: logDate.toISOString(),
temperature: parseFloat(dataArray[1]),
humidity: parseFloat(dataArray[0])
}
}
}
execFile('mosquitto_pub', mosqparam.concat('-t','$aws/things/Omega-XXXX/shadow/update', '-m', JSON.stringify(shadowPayload)), function(error, stdout, stderr) {
// shadow update done
});
});
}, 1000 * 60 * 5);
NOTE: I have obfuscated the name of the Omega device here, as well as the Amazon IoT host name for my own security. You will need to ensure that the host name and device name correspond to your own setups above.
Lets go through this code section by section. At the top are the 'require' statements for the Node.js modules we need. Luckily no NPM installs needed here, as the modules we want are part of the core Node.js install.
Then we define an array called 'mosqparam'. These are actually the parameters that we need to pass to the mosquitto command line each time - mainly so it know the MQTT host (-h) and port (-p) it will be talking to, and where to find the 3 certificates that we downloaded from Amazon IoT and copied across earlier.
Tip: If your application fails to run, it is almost certain that the certificate files either cannot be found, or else they have been corrupted during download or copying across to the Onion. The mosquitto error messages are cryptic at best, and a certificate error doesn't always present to obviously. Take care with this bit.
After this is the meat of the code. We are basically running a function within a javascript setInterval() function which fires once every five minutes.
What this function does is run an execFile() to execute the checkHumidity app that we downloaded and installed earlier. It then takes the two lines that the app returns and splits them by the carriage return (\n) to form an array with two elements. We then create a postData object which contains the temperature, the humidity, and the log time as an ISO8601 string.
Then we transmit that postData object to Amazon IoT by calling execFile() on the 'mosquitto_pub' command that we also installed earlier as part of the mosquitto package. mosquitto_pub basically stands for 'MQTT Publish', and it will send the message (-m) consisting of the postData object translated to JSON, to the topic (-t) 'temp-humidity/Omega-XXXX'.
That is really all we need to do, however, in the code above, I've done something else. Straight after publishing the data packet to the 'temp-humidity/Omega-XXXX' topic, I did a second publish to the '$aws/things/Omega-XXXX/shadow/update' topic as well, with essentially the same data, but with some extra object wrappers around it in shadowPayload.
Why did I do this? Well, the '$aws/things/Omega-XXXX/shadow/update' topic is actually a special Amazon IoT topic which stores the data packet within the 'shadow' copy of the Omega-XXXX thing in the cloud. That means that later on, I can use another software system from anywhere in the world to interrogate the Omega-XXXX shadow in the cloud to see what the latest data readings are.
If for any reason the Onion goes offline or the home internet goes down, I can interrogate the shadow copy to see what and when the last reading was. I don't need to set this up, but for future plans I have, I thought it would be a good idea.
Enough talk - save the above file, lets run the code
cd /home
node app.js
You won't see anything on the screen, but in the background, every 5 minutes, the Omega Onion will read the data and transmit it to. Hopefully it is working.
If it doesn't work - things to check are the location and validity of the certificate file. Also check that your home or work firewall isn't blocking port 8883 which is the port MQTT uses to communicate with Amazon IoT.
Now ideally we want our Node.js app to run as a service on the Omega Onion. That way, if the device reboots or loses power and comes back online, the app will auto start and keep logging data regardless. Fortunately, this is easy as well.
Using nano, create a script file called /etc/init.d/iotapp and save the following in it:
#!/bin/sh /etc/rc.common
# Auto start iot app script

START=40

start() {
echo start
service_start /usr/bin/node /home/app.js &
}

stop() {
echo stop
service_stop /usr/bin/node /home/app.js
}

restart() {
stop
start
}
Save the file, then make it executable:
chmod +x /etc/init.d/iotapp
Now register it to auto-run:
/etc/init.d/iotapp enable
Done. The service should start at bootup, and you can start/stop it anytime from the command line via:
/etc/init.d/iotapp stop
or
/etc/init.d/iotapp start
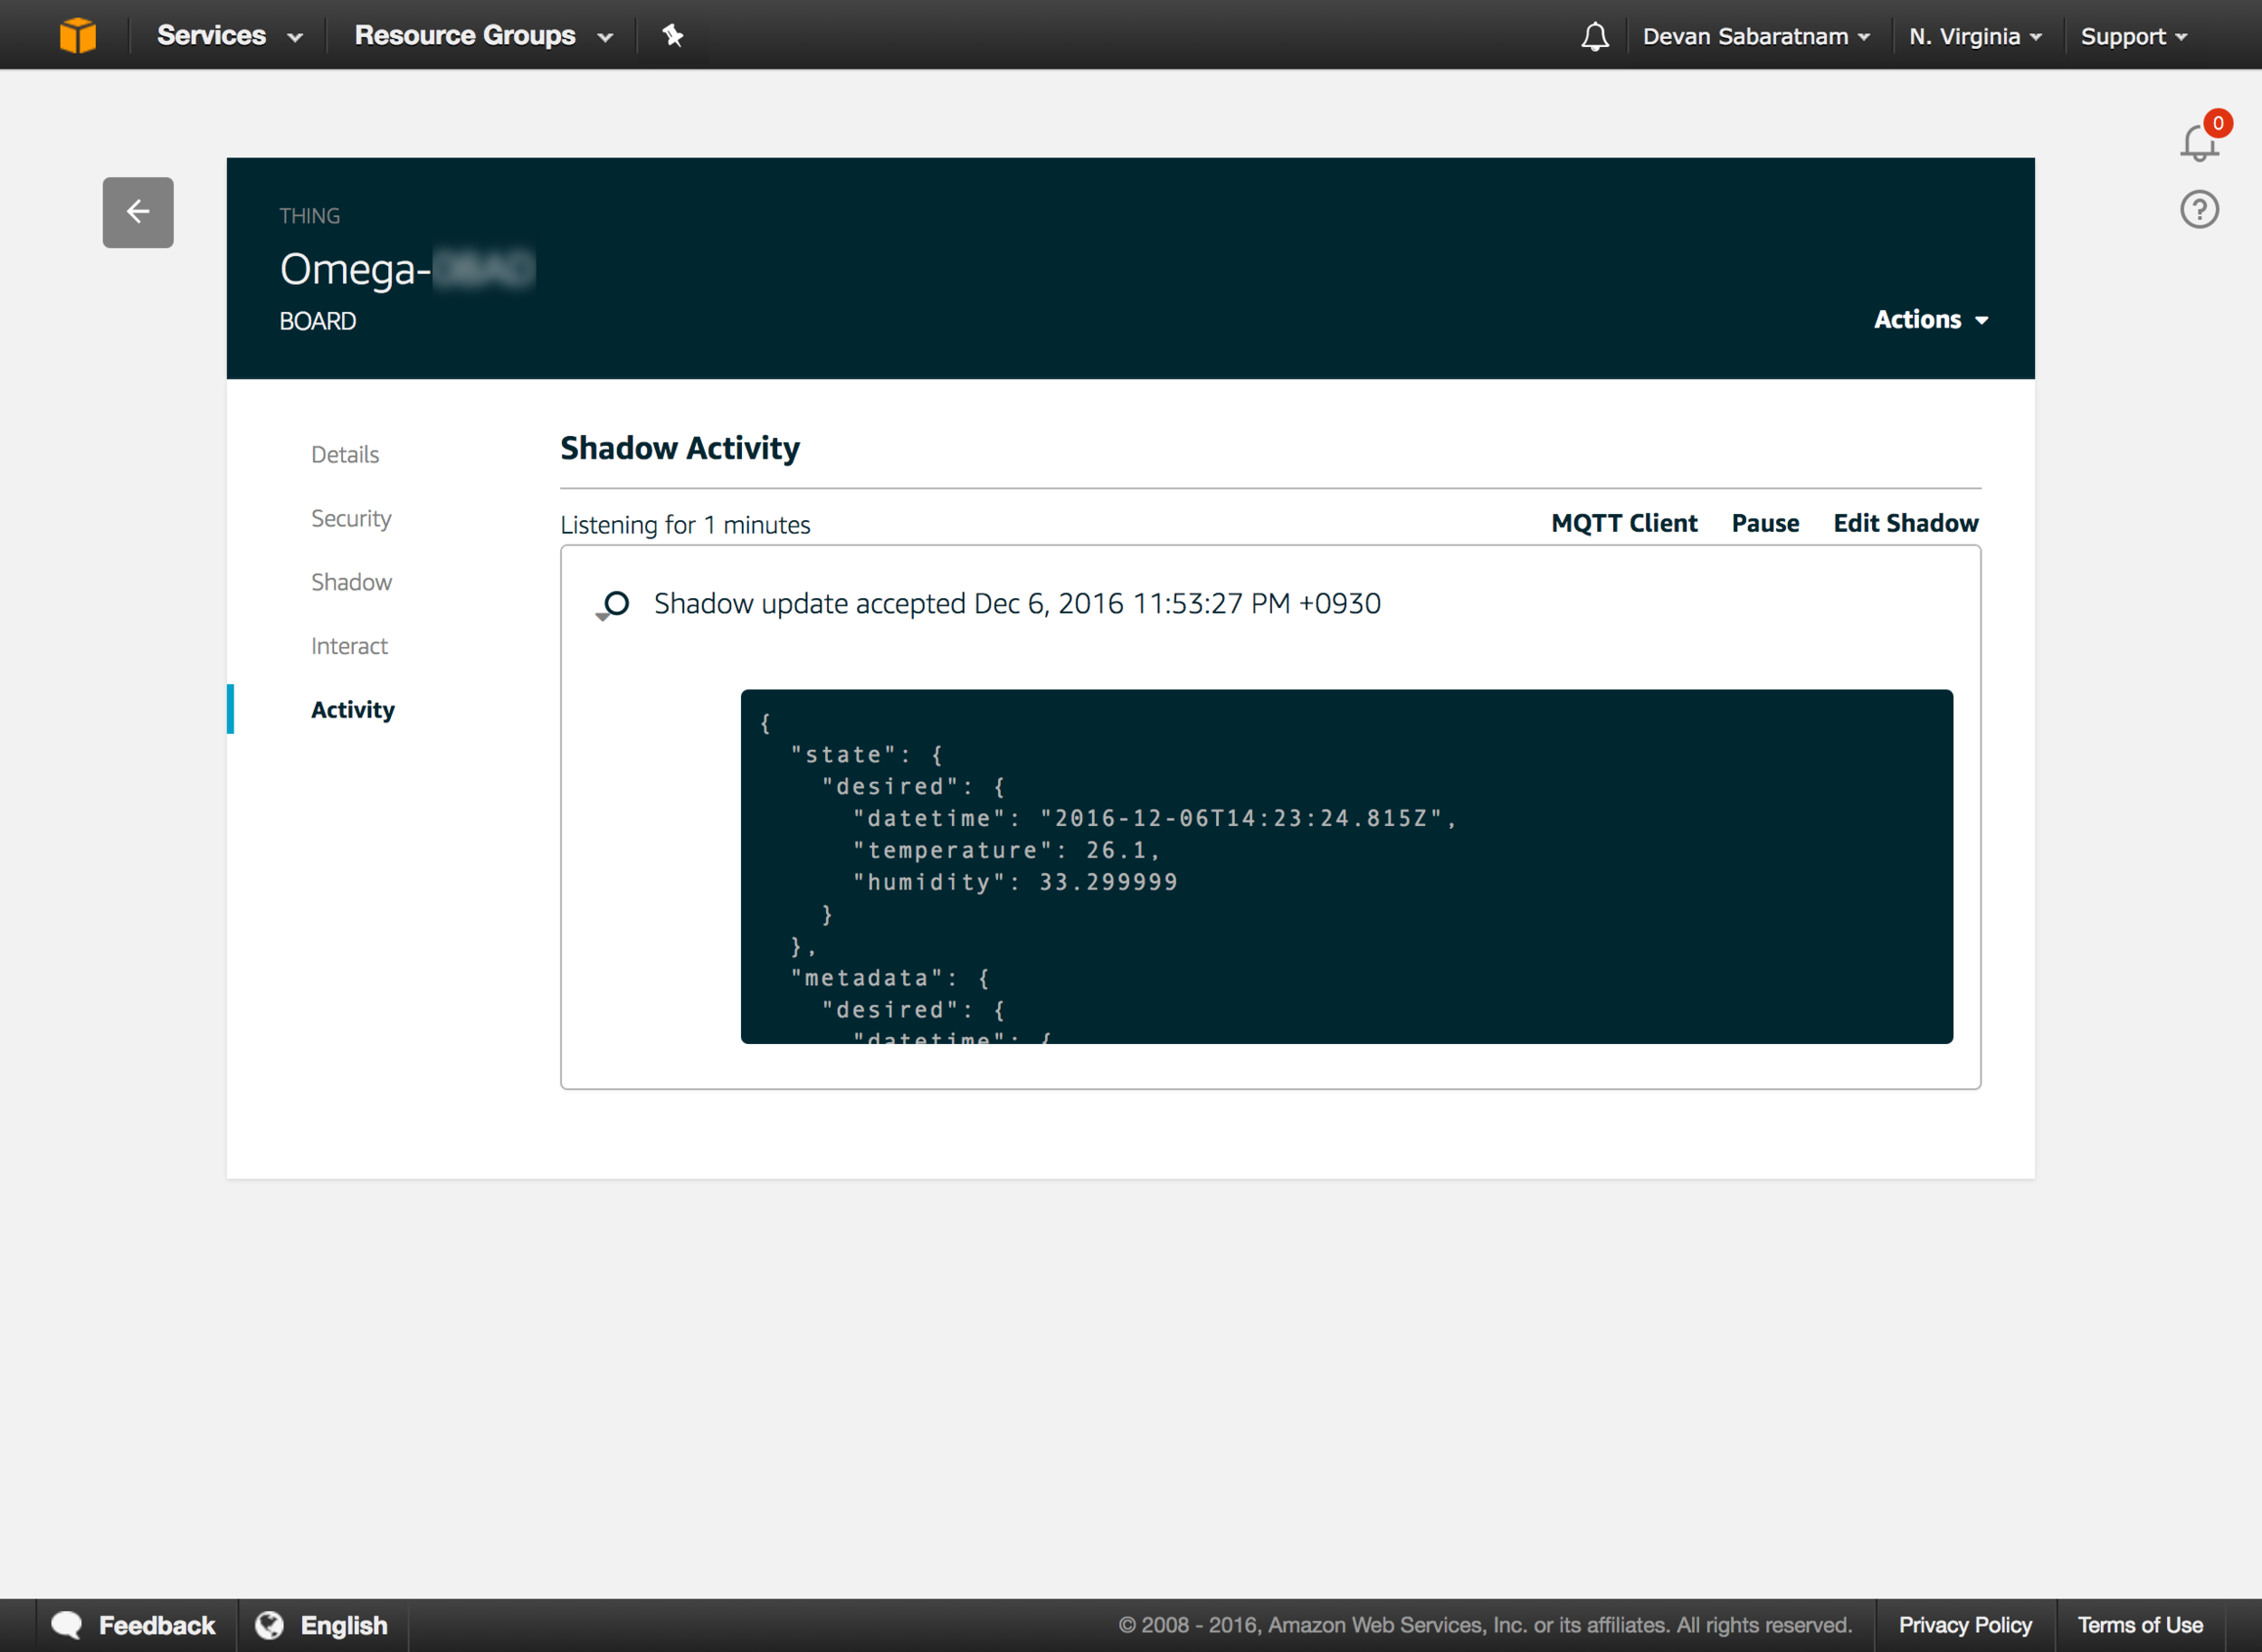
If you go back to your DynamoDB dashboard, click on the table you created, you should be able to see the packet data being sent and updated every 5 or so minutes.

Also, if you go to the Amazon IoT dashboard and click on 'Registry' then 'Things' and then choose your IoT thing, then click on 'Activity', you should see a history of activity from the physical board to the online thing. You can click on each activity line to show the data being sent.
Hopefully everything is working out for you here. Feel free to adjust the setInterval() timing to one minute or so, just so you don't have to wait so long to see if data is being streamed. In fact, tweak the interval setting to whatever you like to suit your own needs. 5 minutes may be too short a span for some, or it may be too long for others. The value is in the very last line of the Node.js code:
1000 (milliseconds) x 60 (seconds in a minute) x 5 (minutes)
Set up the Website
Final stretch now. Funny to think that all that hard work we did above is essentially invisible. But this bit here is what we, as the end user, will see and interact with.
What we will do here is to set up a simple web site which will read the last 24 hours of data from our DynamoDB table we created above, and display it in a nice Chart.js line chart showing us the temperature and humidity plot over that time. The web site itself is a simple Bootstrap/jQuery based one, with a single HTML file and a single .js file with our script to create the charts.
Since I am using Amazon for nearly everything else, I decided to use Amazon S3 to host my website. You don't have to do this, but it is an incredibly cheap and effective way to quickly throw up a static site.
A bigger problem would be how to read DynamoDB data within a javascript code block on a web page. Doing everything client side means that my Amazon credentials will have to be exposed on a publicly accessible platform - meaning anyone can grab it and use it in their own code.
Most knowledgebase articles I scanned suggested using Amazon's Cognito service 'Identity Pools' to set up authentication, but setting up identity pools is another long and painful process. I was fatigued after doing all the above set up by now, so opted for the quick solution of setting up a 'throwaway' Amazon IAM user with just read only privileges on my DynamoDB data table. This is not 'best practice', but I figured for a non critical app like this (I don't really care who can see the temperature setting in my guitar room - it's not like a private video or security feed) that it would do for what I needed.
Additionally, I have CloudWatch alarms set up on my DynamoDB tables so if I see excessively high read rates from nefarious users, I can easily revoke the IAM credentials or shut down the table access.
Amazon IAM
To set up a throwaway IAM, go to the 'Services' menu in your AWS console and choose 'IAM' under 'Security, Identity and Compliance'.
Click on the 'Users' option on the menu down the left, then click 'Create' to create a new IAM user:

Give the user any name you like, but ensure you tick the box saying 'Programmatic Access'. Then click the 'Next: Permissions' button.
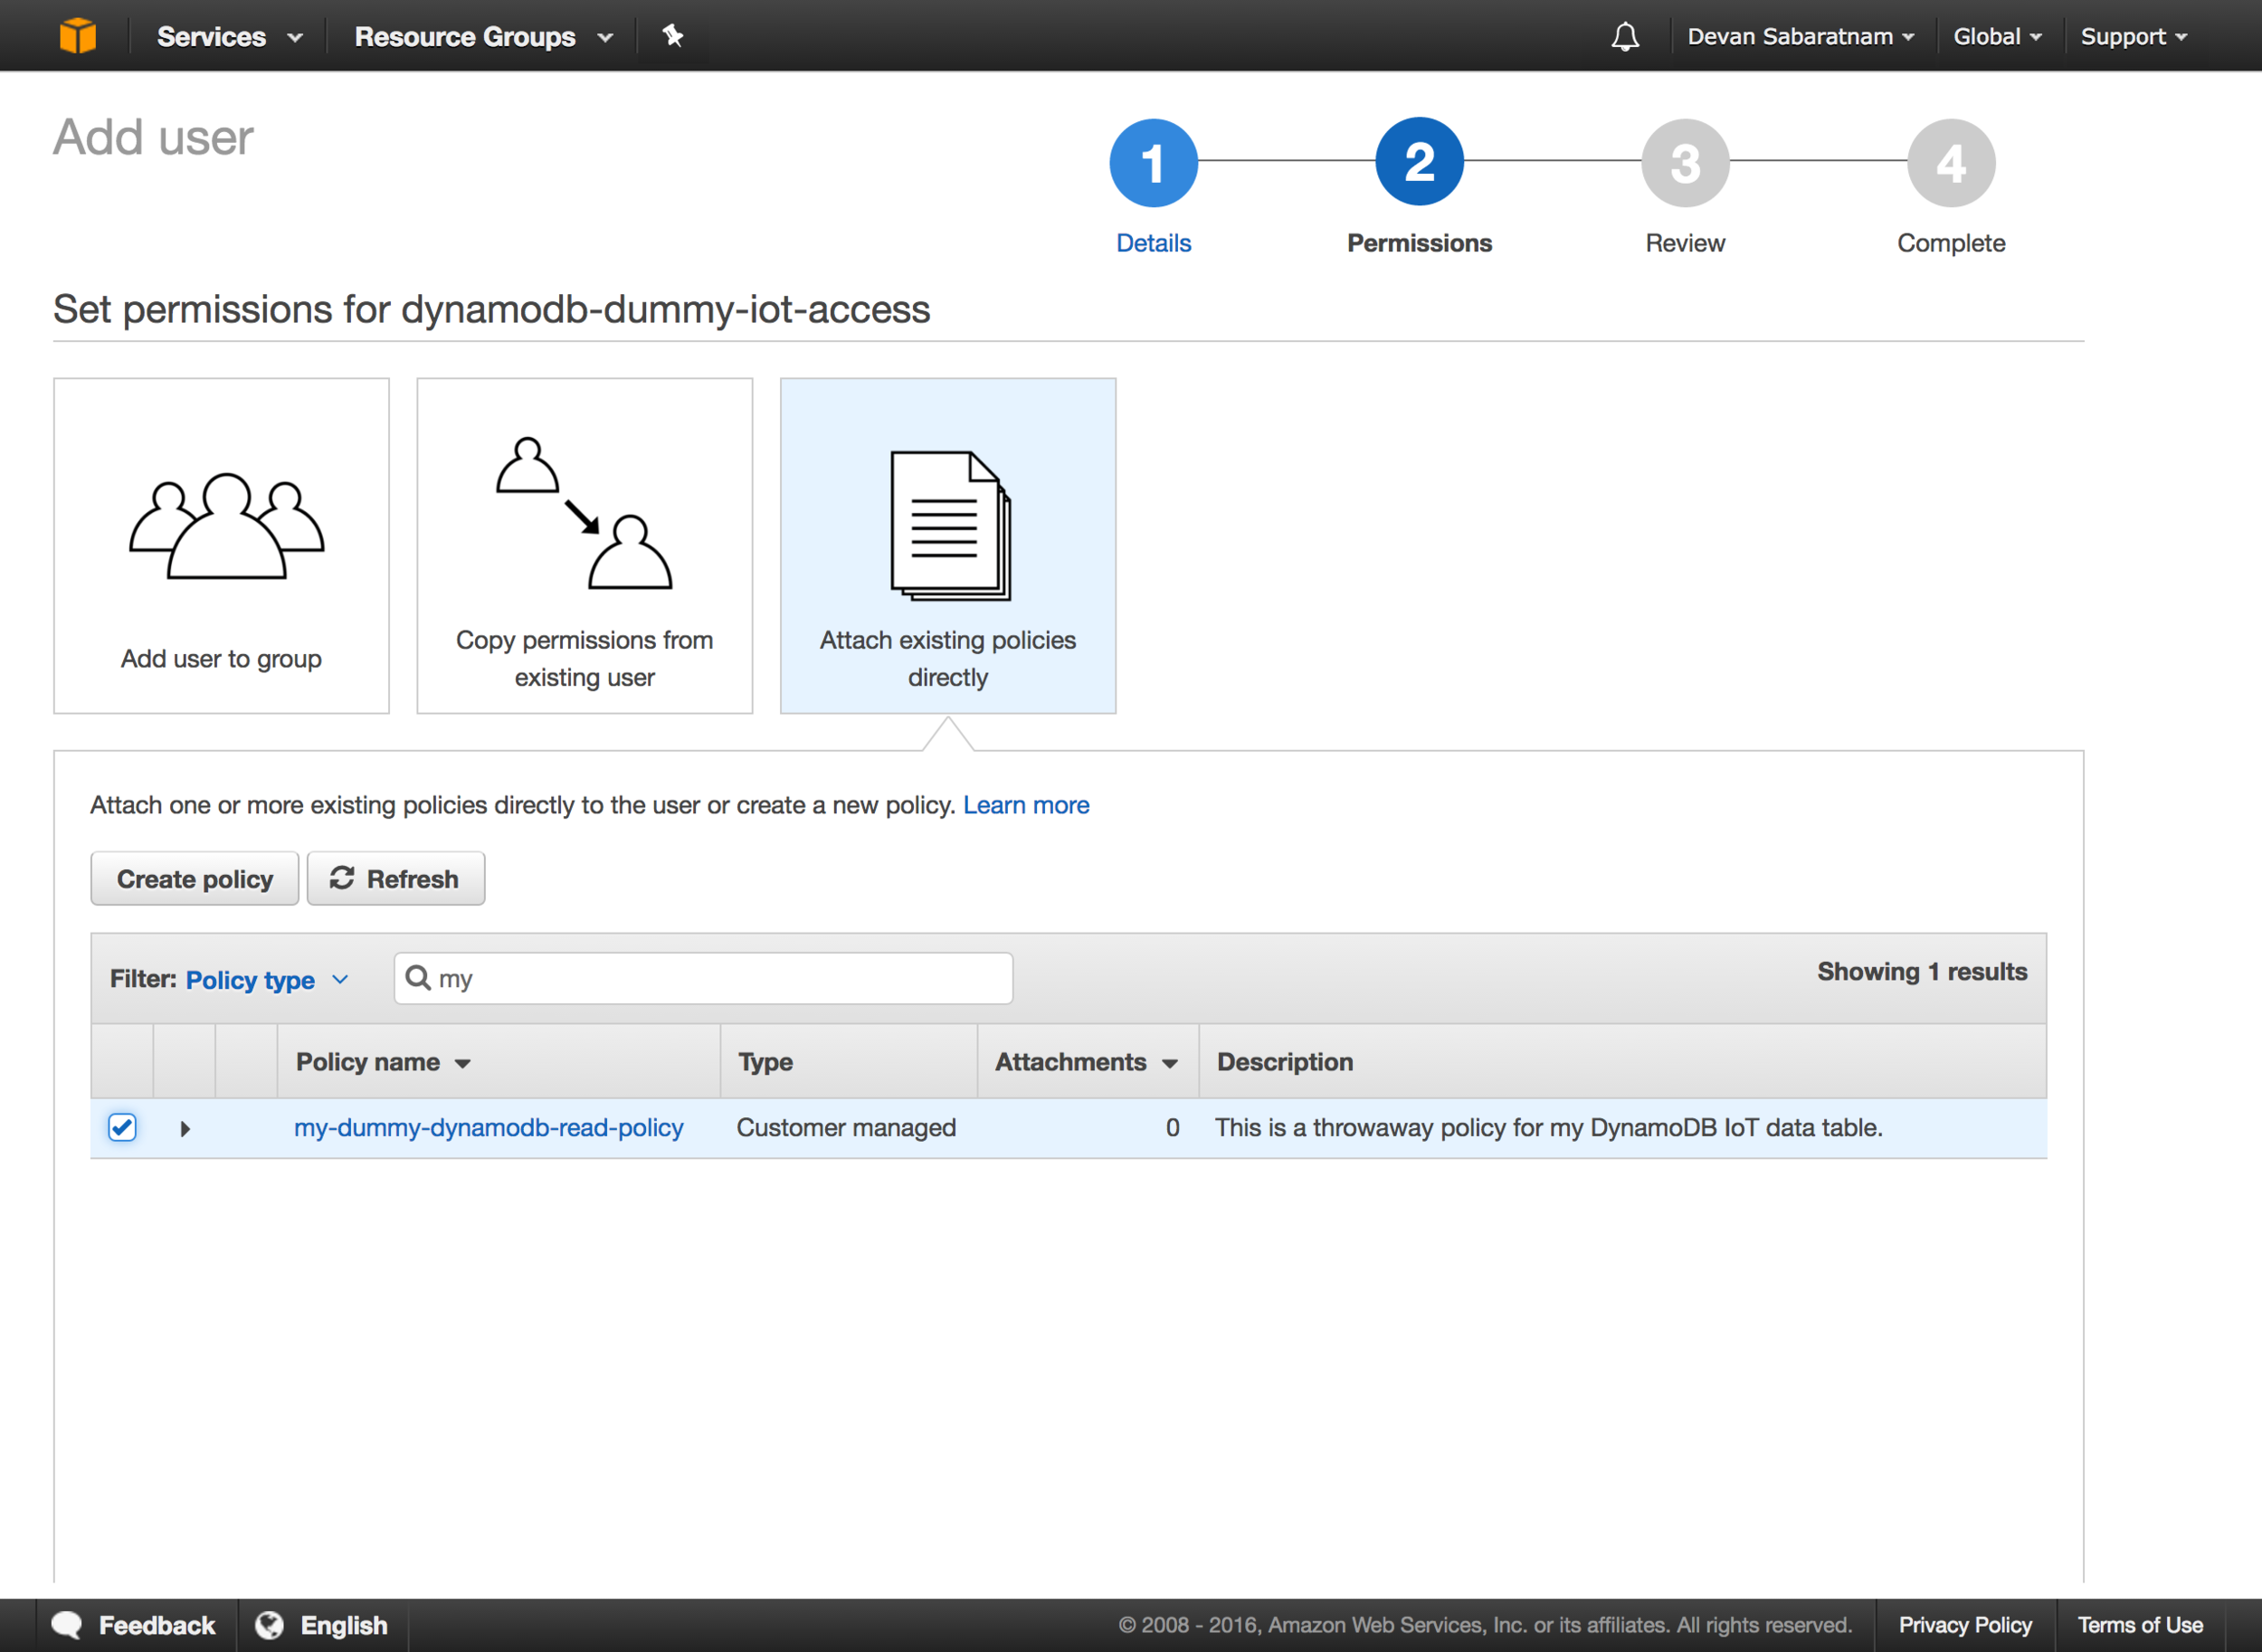
On the next screen, click on the third image at the top which says 'Attach existing policies directly'. Then click on the button that says 'Create Policy'.

Note: This will open the Create Policy screen on a new browser tab.
On the Create Policy screen, click the 'Select' button on the LAST option, i.e. 'Create Your Own Policy'.

Enter in the policy details as below. Ensure that the 'Resource' line contains the ARN of your DynamoDB table like we found out above.

Here is the policy that you can cut and paste into the editor yourself (after substituting your DynamoDB ARN in it):
{
"Version": "2012-10-17",
"Statement": [
{
"Sid": "ReadOnlyIoTDataTable",
"Effect": "Allow",
"Action": [
"dynamodb:DescribeTable",
"dynamodb:Query",
"dynamodb:Scan"
],
"Resource": "<insert your DynamoDB ARN here>"
}
]
}
Once done, click on 'Validate Policy' to ensure everything is OK, the 'Create Policy'.
Now go back to the previous browser tab where you were creating the user, and click the 'Refresh' button. You should now see the policy you just create on the list. (Hint: You can do a search on the policy name). Tick it.
Click 'Next' to go to the review screen, then click 'Create User'.
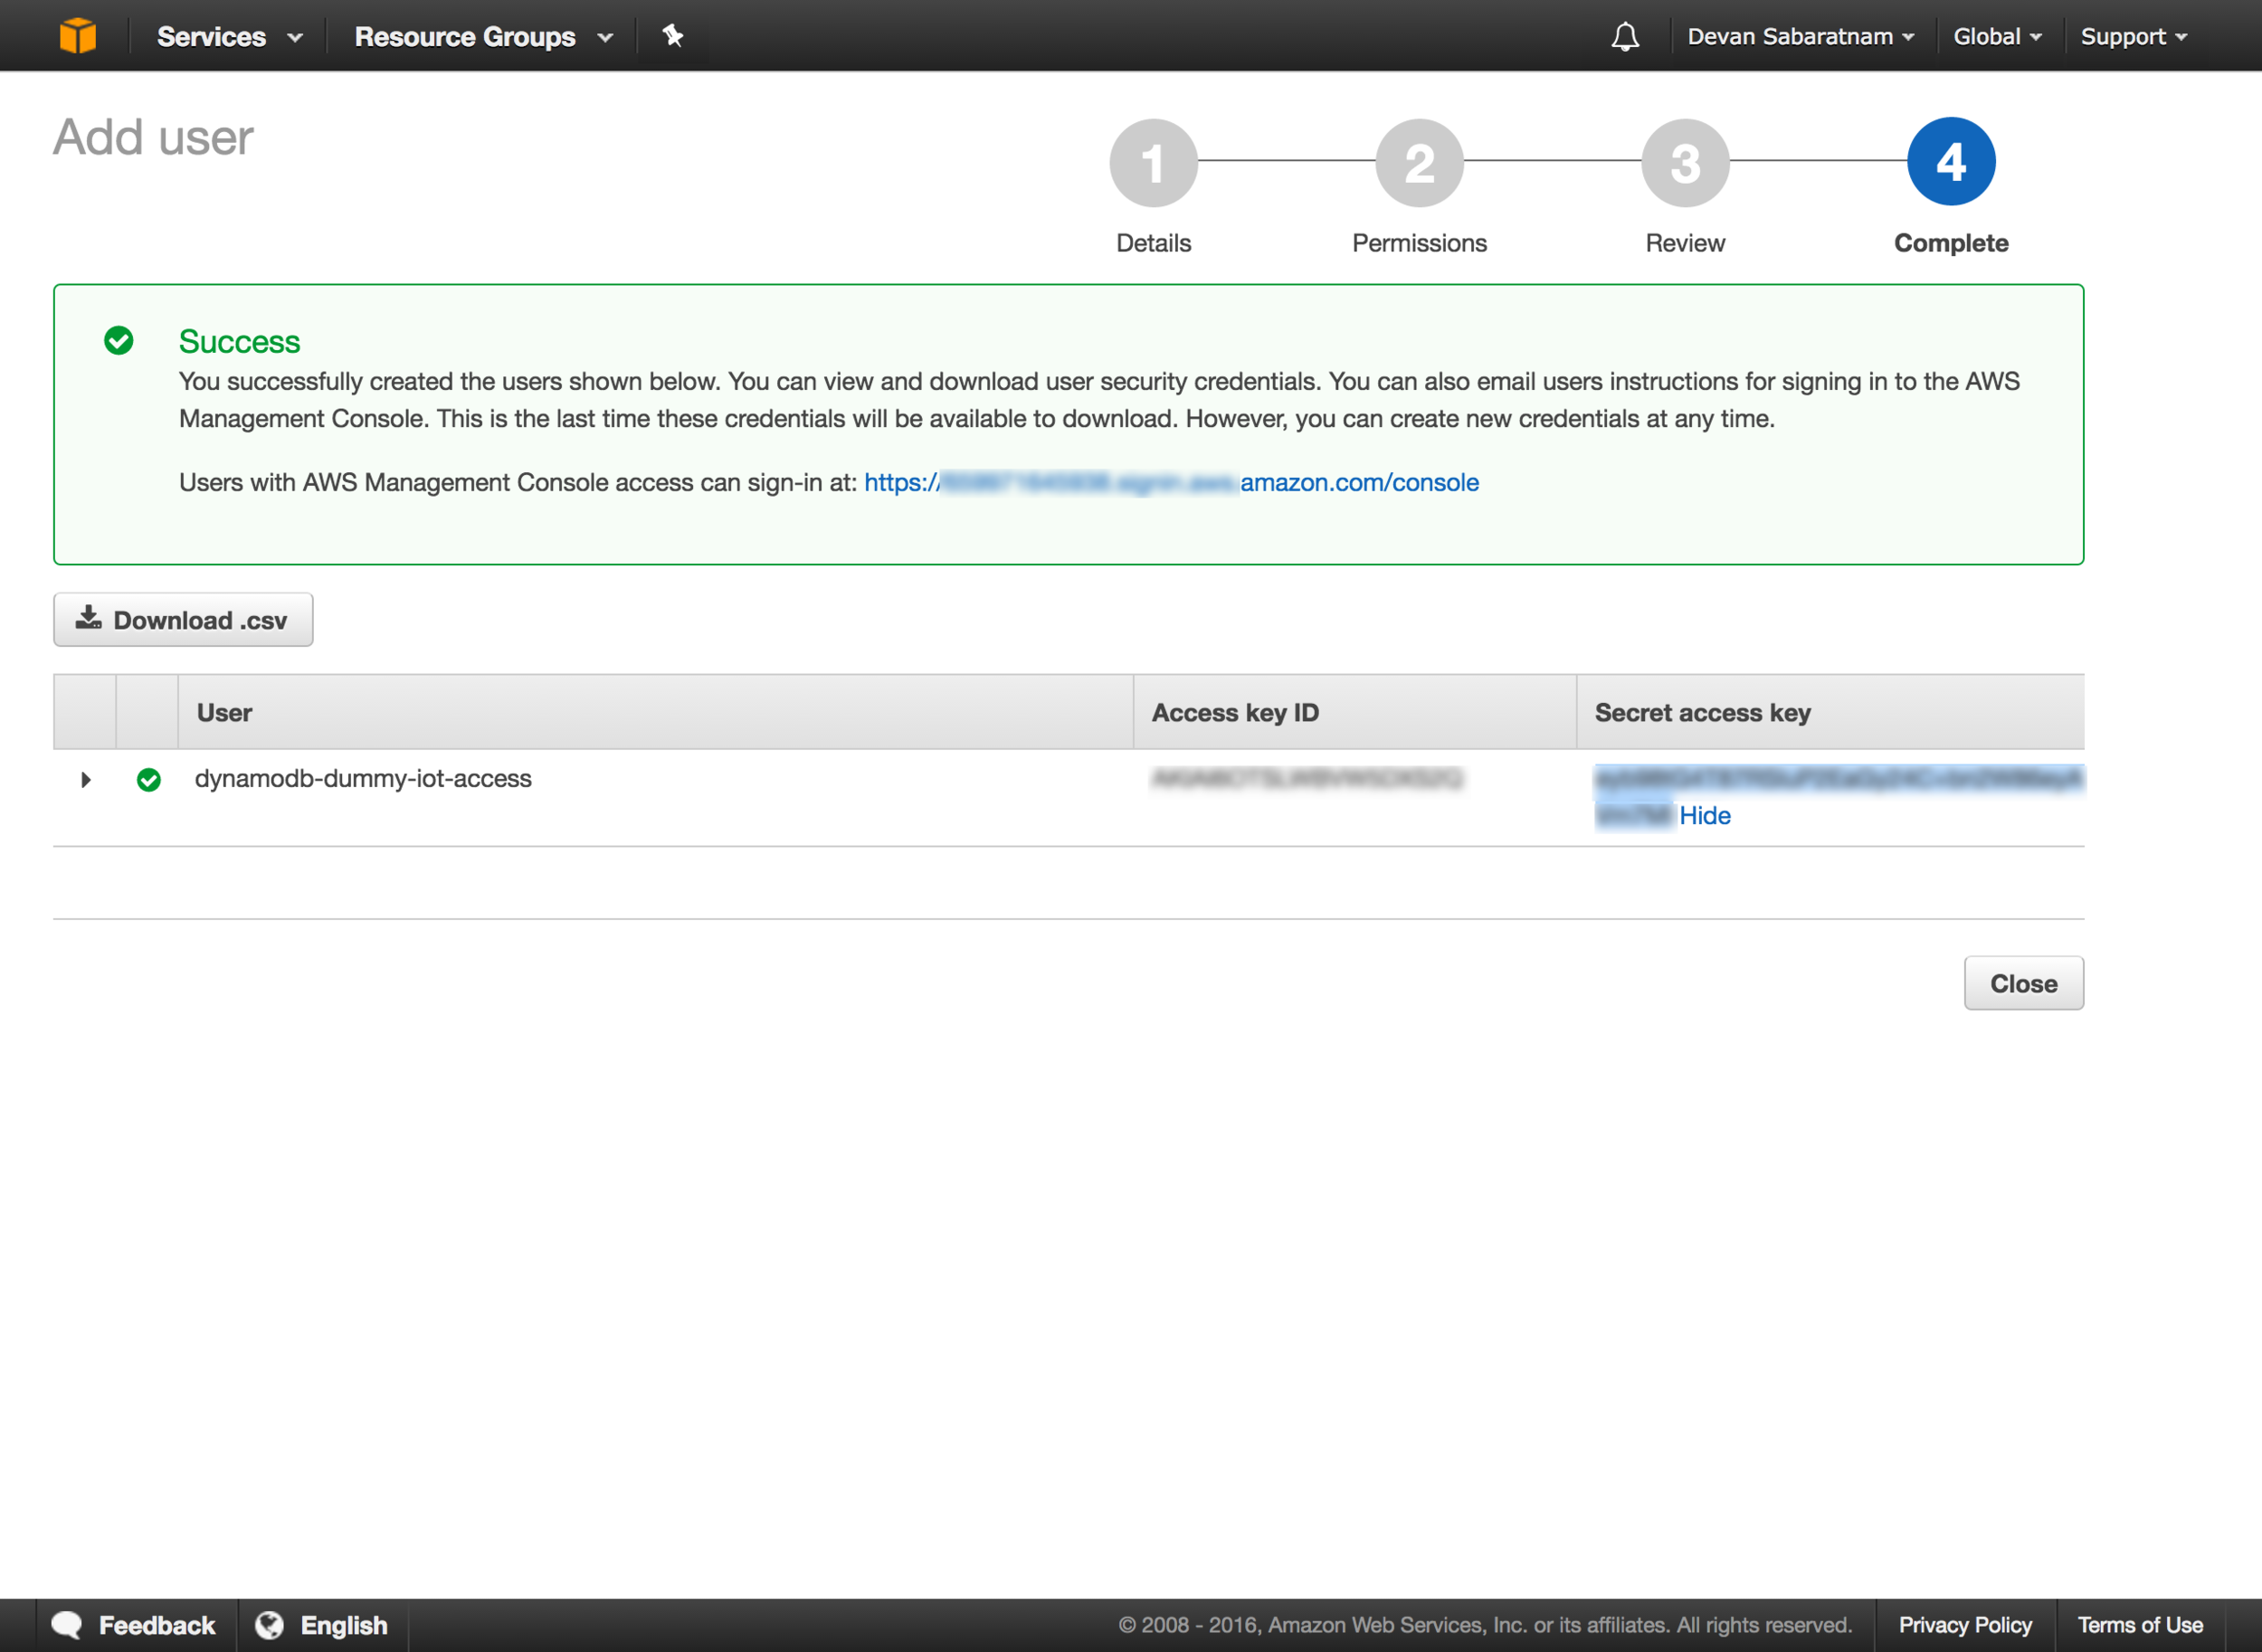
Copy down the key and click on 'Show' to show the secret. Copy both of these and keep them safely aside. We will need them in our web site script below.
Ok, now lets set up the Amazon S3 bucket to host our website.
Amazon S3
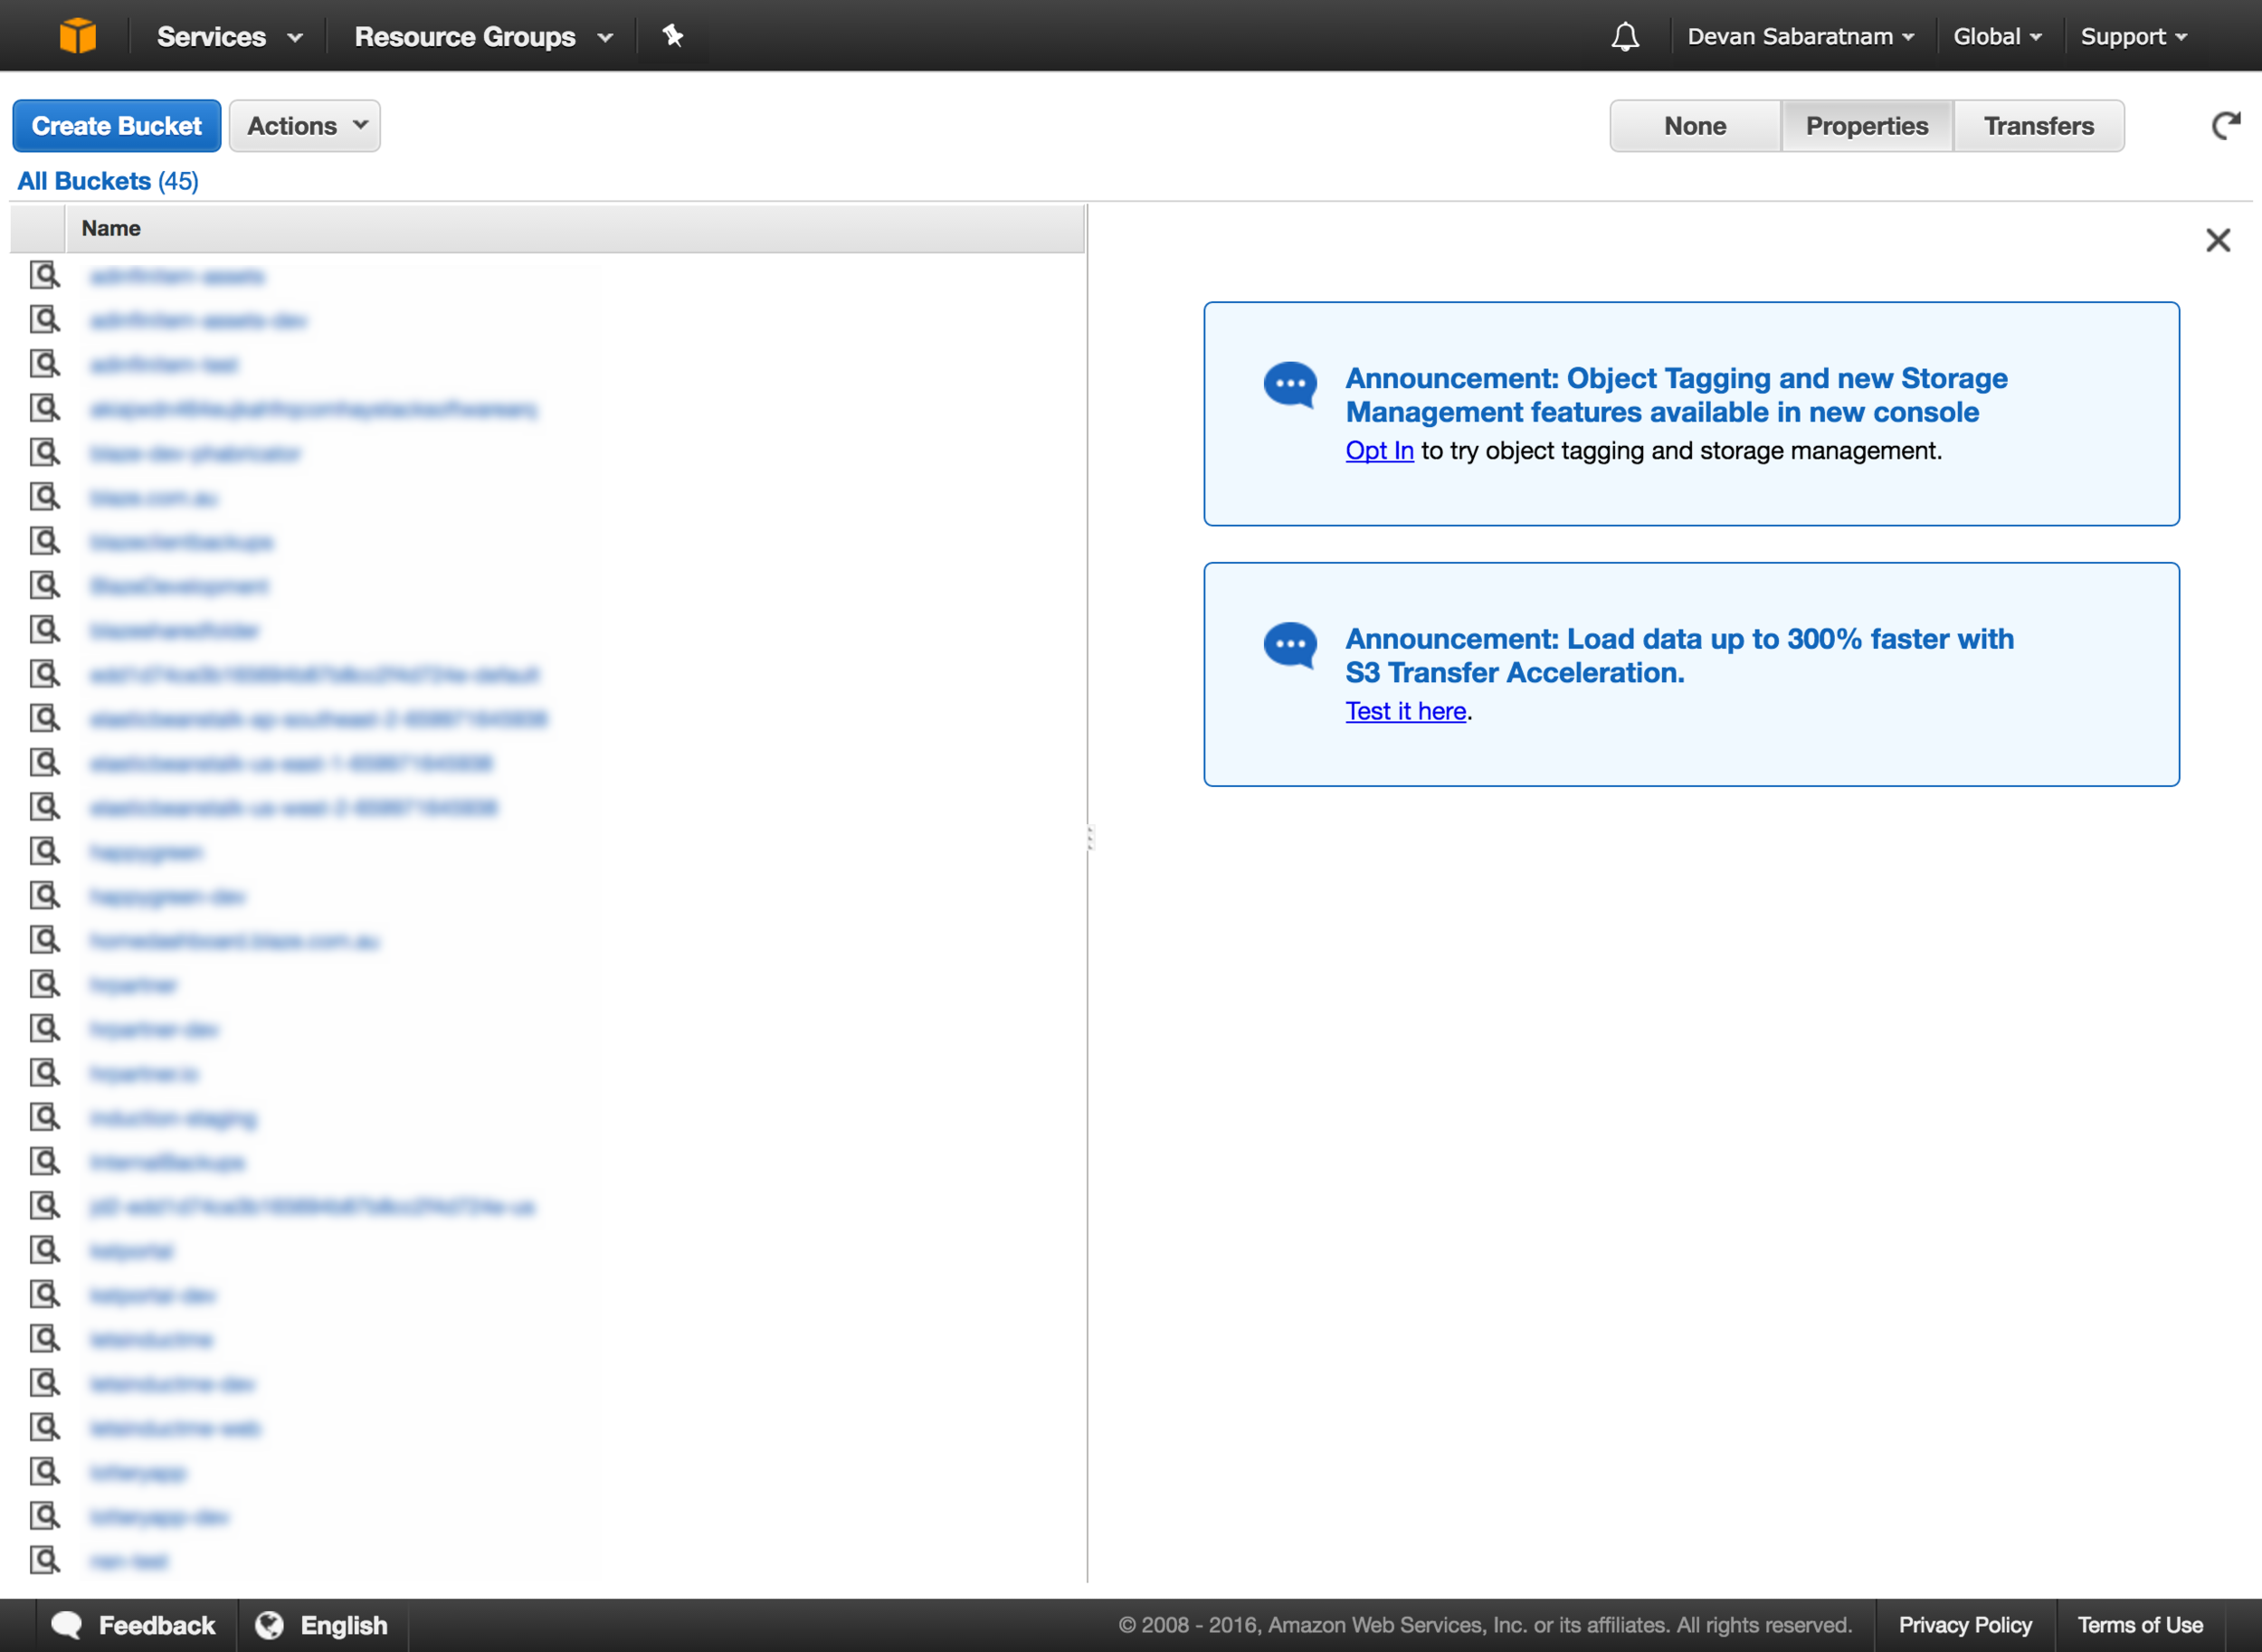
Click on 'Service' on your AWS Console, then choose 'S3' under 'Storage'. You should see a list of buckets if you have used S3 before. Click on 'Create Bucket' on the top left to create a new bucket to host your website.
Give your bucket a meaningful name.
Tip: The bucket name will be part of your website name that you will need to type in your browser, so it helps to make it easy to remember and if it gives a hint as to what it does.

Once the bucket is created, select it from the list of buckets by clicking on the name. Your bucket is obviously empty for now.
Click on the 'Properties' button on the top right, then expand the 'Permissions' section. You will see your own username as a full access user.

Click on the 'Add more permissions' button here, and choose 'Everyone' from the drop down, and tick the 'List' checkbox. This will give all public users the ability to see the contents of this bucket (i.e. your web page). Click on 'Save' to save these permissions.
Next, expand the section below that says 'Static Website Hosting'.

Click on the radio button which says 'Enable website hosting', and enter in 'index.html' in the 'Index Document' field.
Click 'Save'.
That is about it - this is the minimum required to set up a website on S3. You can come back later to include an error page filename and set up logging etc., but this is all we need for now.
NOTE: Copy down the 'Endpoint' link on this page (circled in red). This will be the website address you need to type into your browser bar later to get access to the web page we will be setting up.
Tip: You can use Amazon Route53 to set up a more user friendly name for your website, but we won't go into that in this already lengthy tutorial. There are plenty of resources on Google which go into that in detail.
The Code
Now for the web site code itself. Use your favourite editor to create this index.html file:
<!DOCTYPE html> <html lang="en"> <head> <meta charset="utf-8"> <meta http-equiv="X-UA-Compatible" content="IE=edge"> <meta name="viewport" content="width=device-width, initial-scale=1"> <meta name="description" content=""> <meta name="author" content=""> <title>Home Monitoring App</title> <!-- Bootstrap core CSS --> <link rel="stylesheet" href="https://maxcdn.bootstrapcdn.com/bootstrap/3.3.1/css/bootstrap.min.css"> <!-- HTML5 shim and Respond.js for IE8 support of HTML5 elements and media queries --> <!--[if lt IE 9]> <script src="https://oss.maxcdn.com/html5shiv/3.7.2/html5shiv.min.js"></script> <script src="https://oss.maxcdn.com/respond/1.4.2/respond.min.js"></script> <![endif]--> </head> <body> <div class="container"> <br /> <div class="jumbotron text-center"> <h1>Temperature & Humidity Dashboard</h1> <p class="lead">Guitar Storage Room</p> </div> <div class="row"> <div class="col-md-6"> <canvas id="temperaturegraph" class="inner cover" width="500" height="320"></canvas> <br /> <div class="panel panel-default"> <div class="panel-body"> <div class="row"> <div class="col-sm-3 text-right"> <span class="label label-danger">High</span> </div> <div class="col-sm-9"> <span id="t-high" class="text-muted">(n/a)</span> </div> </div> <div class="row"> <div class="col-sm-3 text-right"> <span class="label label-success">Low</span> </div> <div class="col-sm-9"> <span id="t-low" class="text-muted">(n/a)</span> </div> </div> </div> </div> </div> <div class="col-md-6"> <canvas id="humiditygraph" class="inner cover" width="500" height="320"></canvas> <br /> <div class="panel panel-default"> <div class="panel-body"> <div class="row"> <div class="col-sm-3 text-right"> <span class="label label-danger">High</span> </div> <div class="col-sm-9"> <span id="h-high" class="text-muted">(n/a)</span> </div> </div> <div class="row"> <div class="col-sm-3 text-right"> <span class="label label-success">Low</span> </div> <div class="col-sm-9"> <span id="h-low" class="text-muted">(n/a)</span> </div> </div> </div> </div> </div> </div> <div class="row"> <div class="col-md-12"> <p class="text-center">5 minute feed from home sensors for the past 24 hours.</p> </div> </div> <footer class="footer"> <pclass="text-center">Copyright © Devan Sabaratnam - Blaze Business Software Pty Ltd</p> </footer> </div> <!-- /container --> <script src="https://ajax.googleapis.com/ajax/libs/jquery/1.11.1/jquery.min.js"></script> <script src="https://sdk.amazonaws.com/js/aws-sdk-2.1.40.min.js"></script> <script src="https://cdnjs.cloudflare.com/ajax/libs/Chart.js/2.4.0/Chart.min.js"></script> <script src="refresh.js"></script> </body> </html>
Nothing magical here - just a simple HTML page using bootstrap constructs to place the chart canvas elements on the page in two columns. We are loading all script and css goodies using external CDN links for Bootstrap, jQuery, Amazon SDK and Chart.js etc. so we don't have to clutter up our web server with extra .js and .css files.
Next we code up the script, in a file called refresh.js:
AWS.config.region = 'us-east-1';
AWS.config.credentials = new AWS.Credentials('AKIZBYNOTREALPQCRTVQ', 'FYu9Jksl/aThIsNoT/ArEaL+K3yTR8fjpLkKg');

var dynamodb = new AWS.DynamoDB();
var datumVal = new Date() - 86400000;
var params = {
TableName: 'iot-temperature-humidity',
KeyConditionExpression: '#id = :iottopic and #ts >= :datum',
ExpressionAttributeNames: {
"#id": "id",
"#ts": "timestamp"
},
ExpressionAttributeValues: {
":iottopic": { "S" : "temp-humidity/Omega-XXXX"},
":datum": { "N" : datumVal.toString()}
}
 };

/* Create the context for applying the chart to the HTML canvas */
var tctx = $("#temperaturegraph").get(0).getContext("2d");
var hctx = $("#humiditygraph").get(0).getContext("2d");

/* Set the options for our chart */
var options = {
responsive: true,
showLines: true,
scales: {
xAxes: [{
display: false
}],
yAxes: [{
ticks: {
beginAtZero:true
}
}]
}
};

/* Set the inital data */
var tinit = {
labels: [],
datasets: [
{
label: "Temperature °C",
backgroundColor: 'rgba(204,229,255,0.5)',
borderColor: 'rgba(153,204,255,0.75)',
data: []
}
]
};

var hinit = {
labels: [],
datasets: [
{
label: "Humidity %",
backgroundColor: 'rgba(229,204,255,0.5)',
borderColor: 'rgba(204,153,255,0.75)',
data: []
}
]
};

var temperaturegraph = new Chart.Line(tctx, {data: tinit, options: options});
var humiditygraph = new Chart.Line(hctx, {data: hinit, options: options});

$(function() {
getData();
$.ajaxSetup({ cache: false });
setInterval(getData, 300000);
});

/* Makes a scan of the DynamoDB table to set a data object for the chart */
function getData() {
dynamodb.query(params, function(err, data) {
if (err) {
console.log(err);
return null;
} else {

// placeholders for the data arrays
var temperatureValues = [];
var humidityValues = [];
var labelValues = [];

// placeholders for the data read
var temperatureRead = 0.0;
var humidityRead = 0.0;
var timeRead = "";

// placeholders for the high/low markers
var temperatureHigh = -999.0;
var humidityHigh = -999.0;
var temperatureLow = 999.0;
var humidityLow = 999.0;
var temperatureHighTime = "";
var temperatureLowTime = "";
var humidityHighTime = "";
var humidityLowTime = "";

for (var i in data['Items']) {
// read the values from the dynamodb JSON packet
temperatureRead = parseFloat(data['Items'][i]['payload']['M']['temperature']['N']);
humidityRead = parseFloat(data['Items'][i]['payload']['M']['humidity']['N']);
timeRead = new Date(data['Items'][i]['payload']['M']['datetime']['S']);

// check the read values for high/low watermarks
if (temperatureRead < temperatureLow) {
temperatureLow = temperatureRead;
temperatureLowTime = timeRead;
}
if (temperatureRead > temperatureHigh) {
temperatureHigh = temperatureRead;
temperatureHighTime = timeRead;
}
if (humidityRead < humidityLow) {
humidityLow = humidityRead;
humidityLowTime = timeRead;
}
if (humidityRead > humidityHigh) {
humidityHigh = humidityRead;
humidityHighTime = timeRead;
}

// append the read data to the data arrays
temperatureValues.push(temperatureRead);
humidityValues.push(humidityRead);
labelValues.push(timeRead);
}

// set the chart object data and label arrays
temperaturegraph.data.labels = labelValues;
temperaturegraph.data.datasets[0].data = temperatureValues;

humiditygraph.data.labels = labelValues;
humiditygraph.data.datasets[0].data = humidityValues;

// redraw the graph canvas
temperaturegraph.update();
humiditygraph.update();

// update the high/low watermark sections
$('#t-high').text(Number(temperatureHigh).toFixed(2).toString() + '°C at ' + temperatureHighTime);
$('#t-low').text(Number(temperatureLow).toFixed(2).toString() + '°C at ' + temperatureLowTime);
$('#h-high').text(Number(humidityHigh).toFixed(2).toString() + '% at ' + humidityHighTime);
$('#h-low').text(Number(humidityLow).toFixed(2).toString() + '% at ' + humidityLowTime);

}
});
}
Lets go through this script in detail.
The first two lines set up the Amazon AWS SDK. We need to specify the AWS region, then we need to specify the credentials we will be using for interrogating the DynamoDB table. Copy and paste in the Key and Secret that you created in the previous section here.
The next bit is initialising the AWS DynamoDB object in 'dynamodb'. The 'datumVal' variable contains a timestamp that is 24 hours before the current date/time. This will be used in the DynamoDB query to only select data rows in the prior 24 hour period.
The 'params' object contains the parameters that will be sent to the dynamodb object to select the table, and run a query upon it. I am not a fan of NoSQL, mainly because querying data is a huge pain, and this proves it. The next 10 lines are purely setting up an expression to look at the ID and the Timestamp columns in the DynamoDB table, and pull our all ID's which contain 'temp-humidity/Omega-XXX' (remember, the ID is actually the topic, including the thing identifier), and a timestamp that is greater than, or equal to the 'datum' that we set before.
Next, on line 20 and 21 we set up the context placeholders for the two charts. Simple Chart.js stuff here.
Lines 23 to 62 we are simply setting up some default placeholders for the charts, including the colours of the lines and shading etc. I am also using some xAxes and yAxes properties to turn off the X-axis labels and to ensure the Y-Axis starts at a zero base. You can omit these if you want the graph to look more dynamic (or cluttered! :)).
Lines 64 and 65 is just initialising the Chart.js objects with the above options and context.
Next comes a generic function that calls the getData() function every five minutes. You can change the setInterval() parameter from 300000 (1000 milliseconds per second x 60 seconds per minute x 5 minutes) to whatever you like. But seeing as we are only pushing temperature and humidity data from our Onion to Amazon IoT every 5 minutes as well, anything less than a 5 minute check is just overkill. Feel free to tailor these numbers to suit your own purposes though.
Line 70 to the end is just the getData() function itself. All this does is run a query against the 'dynamodb' object using the 'params' we supplied for the query parameters etc.
The results are returned in the data['Items'] array.
Lines 81 to 84 just sets up the placeholder arrays for the values and labels to be used on the charts.
Lines 86 to 99 I have set up purely for checking the highest and lowest settings for the temperature and humidity reading. You can elect not to do this, but I wanted to show on the main page the highs/lows for the preceding 24 hour period. I am simply initialising some empty variable here to use in the following loop.
Lines 101 to 129 is just a simple loop that runs through the returned data['Items'] array and parses the keys into the variables and arrays I defined above. I am also comparing the read values against the highs and lows. For every array element I read, I check to see if the highs are higher than the last highest value, and the lows lower that the last value(s), and update the highs/lows accordingly.
Then, after the loop, lines 132 to 136 update the Chart.js chart data and labels with what we have read in the loop.
Lines 139 and 140 force the charts to redraw themselves. Lines 143 to 146 use jQuery AJAX calls to update the High and Low sections on the main web page with the readings and times.
That is it!
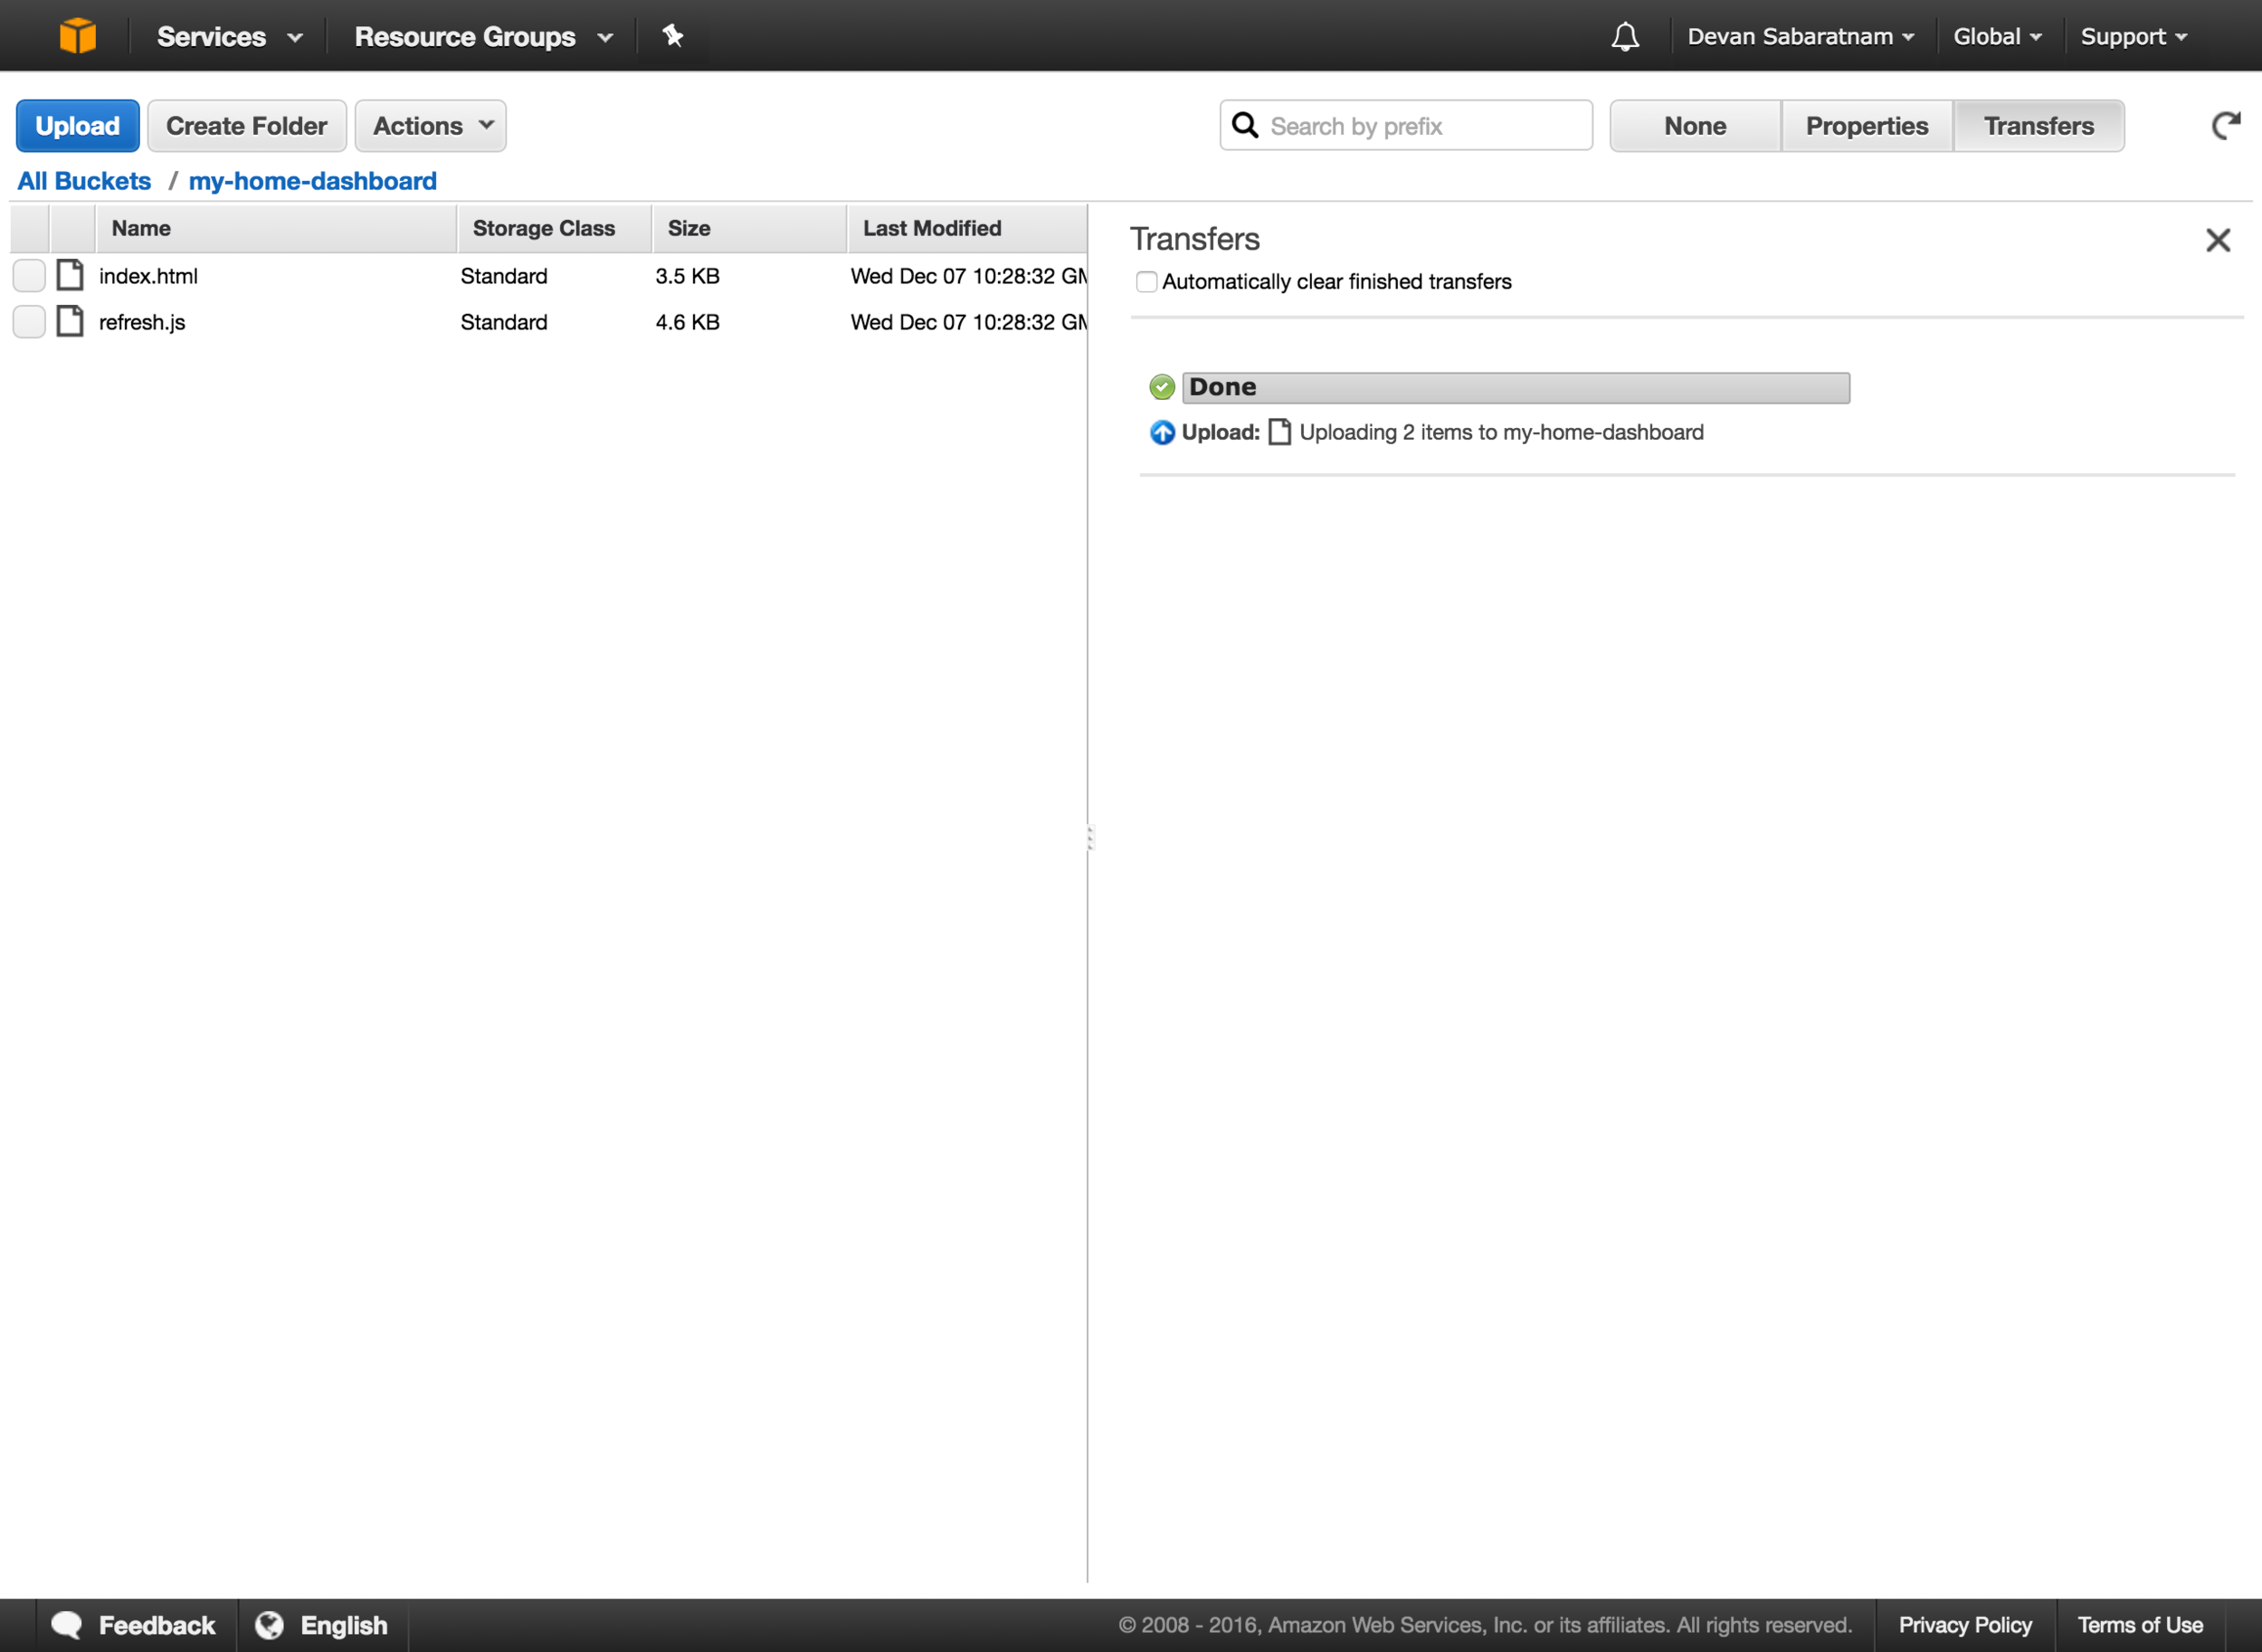
Save these two files, then upload them to your bucket by going back to your Amazon S3 Bucket screen and clicking on the 'Actions' button and choosing 'Upload Files'.

Drag and drop the two files onto the upload screen, but don't start it yet! Click on the 'Set Details >' button at the bottom, then immediately click on 'Set Permissions >'.

Make sure you tick the box that says 'Make everything public', otherwise nobody can see your index.html file!
Now click 'Start Upload' to begin uploading the two files.
You are DONE! Can you believe it?? We are done. Finished. Completed.
If you type in the website address we noted down earlier into your browser, you should be able to see a beautiful dashboard showing the collected data from your Onion Omega device.

Conclusion
If you made it this far, then congratulations on achieving this marathon. It took me several days to nut the above settings out, and many false starts and frustrations along with it. I am hoping that by documenting what eventually worked for me, I can reduce your stress and wasted time and set you on the path to IoT development a lot quicker and easier.
Next steps for me are to set up a battery power source for my Omega Onion, so it doesn't have to be connected to my computer, and can sit on a shelf somewhere in my guitar storage room and still report to me.
Let me know if you find this tutorial useful, and please also let me know what you guys have built with IoT - it is a fascinating field!